

Products Solutions Loggworks Resources Follow us
Last updated on Feb 29, 2024
This guide will take you through how to manage your WhatsApp conversations from Loggworks.
Before bringing your WhatsApp inbox to Loggworks, you need to set some things up in the API provider you want to use. These prerequisites are explained below.
If you are planning to use the WhatsApp Cloud API, the following two prerequisites are needed.
First, you need to create your Facebook Developer app with WhatsApp Product enabled. Go to the WhatsApp Cloud API Guide and navigate to the section called Set up Developer Assets and Platform Access and follow the steps.
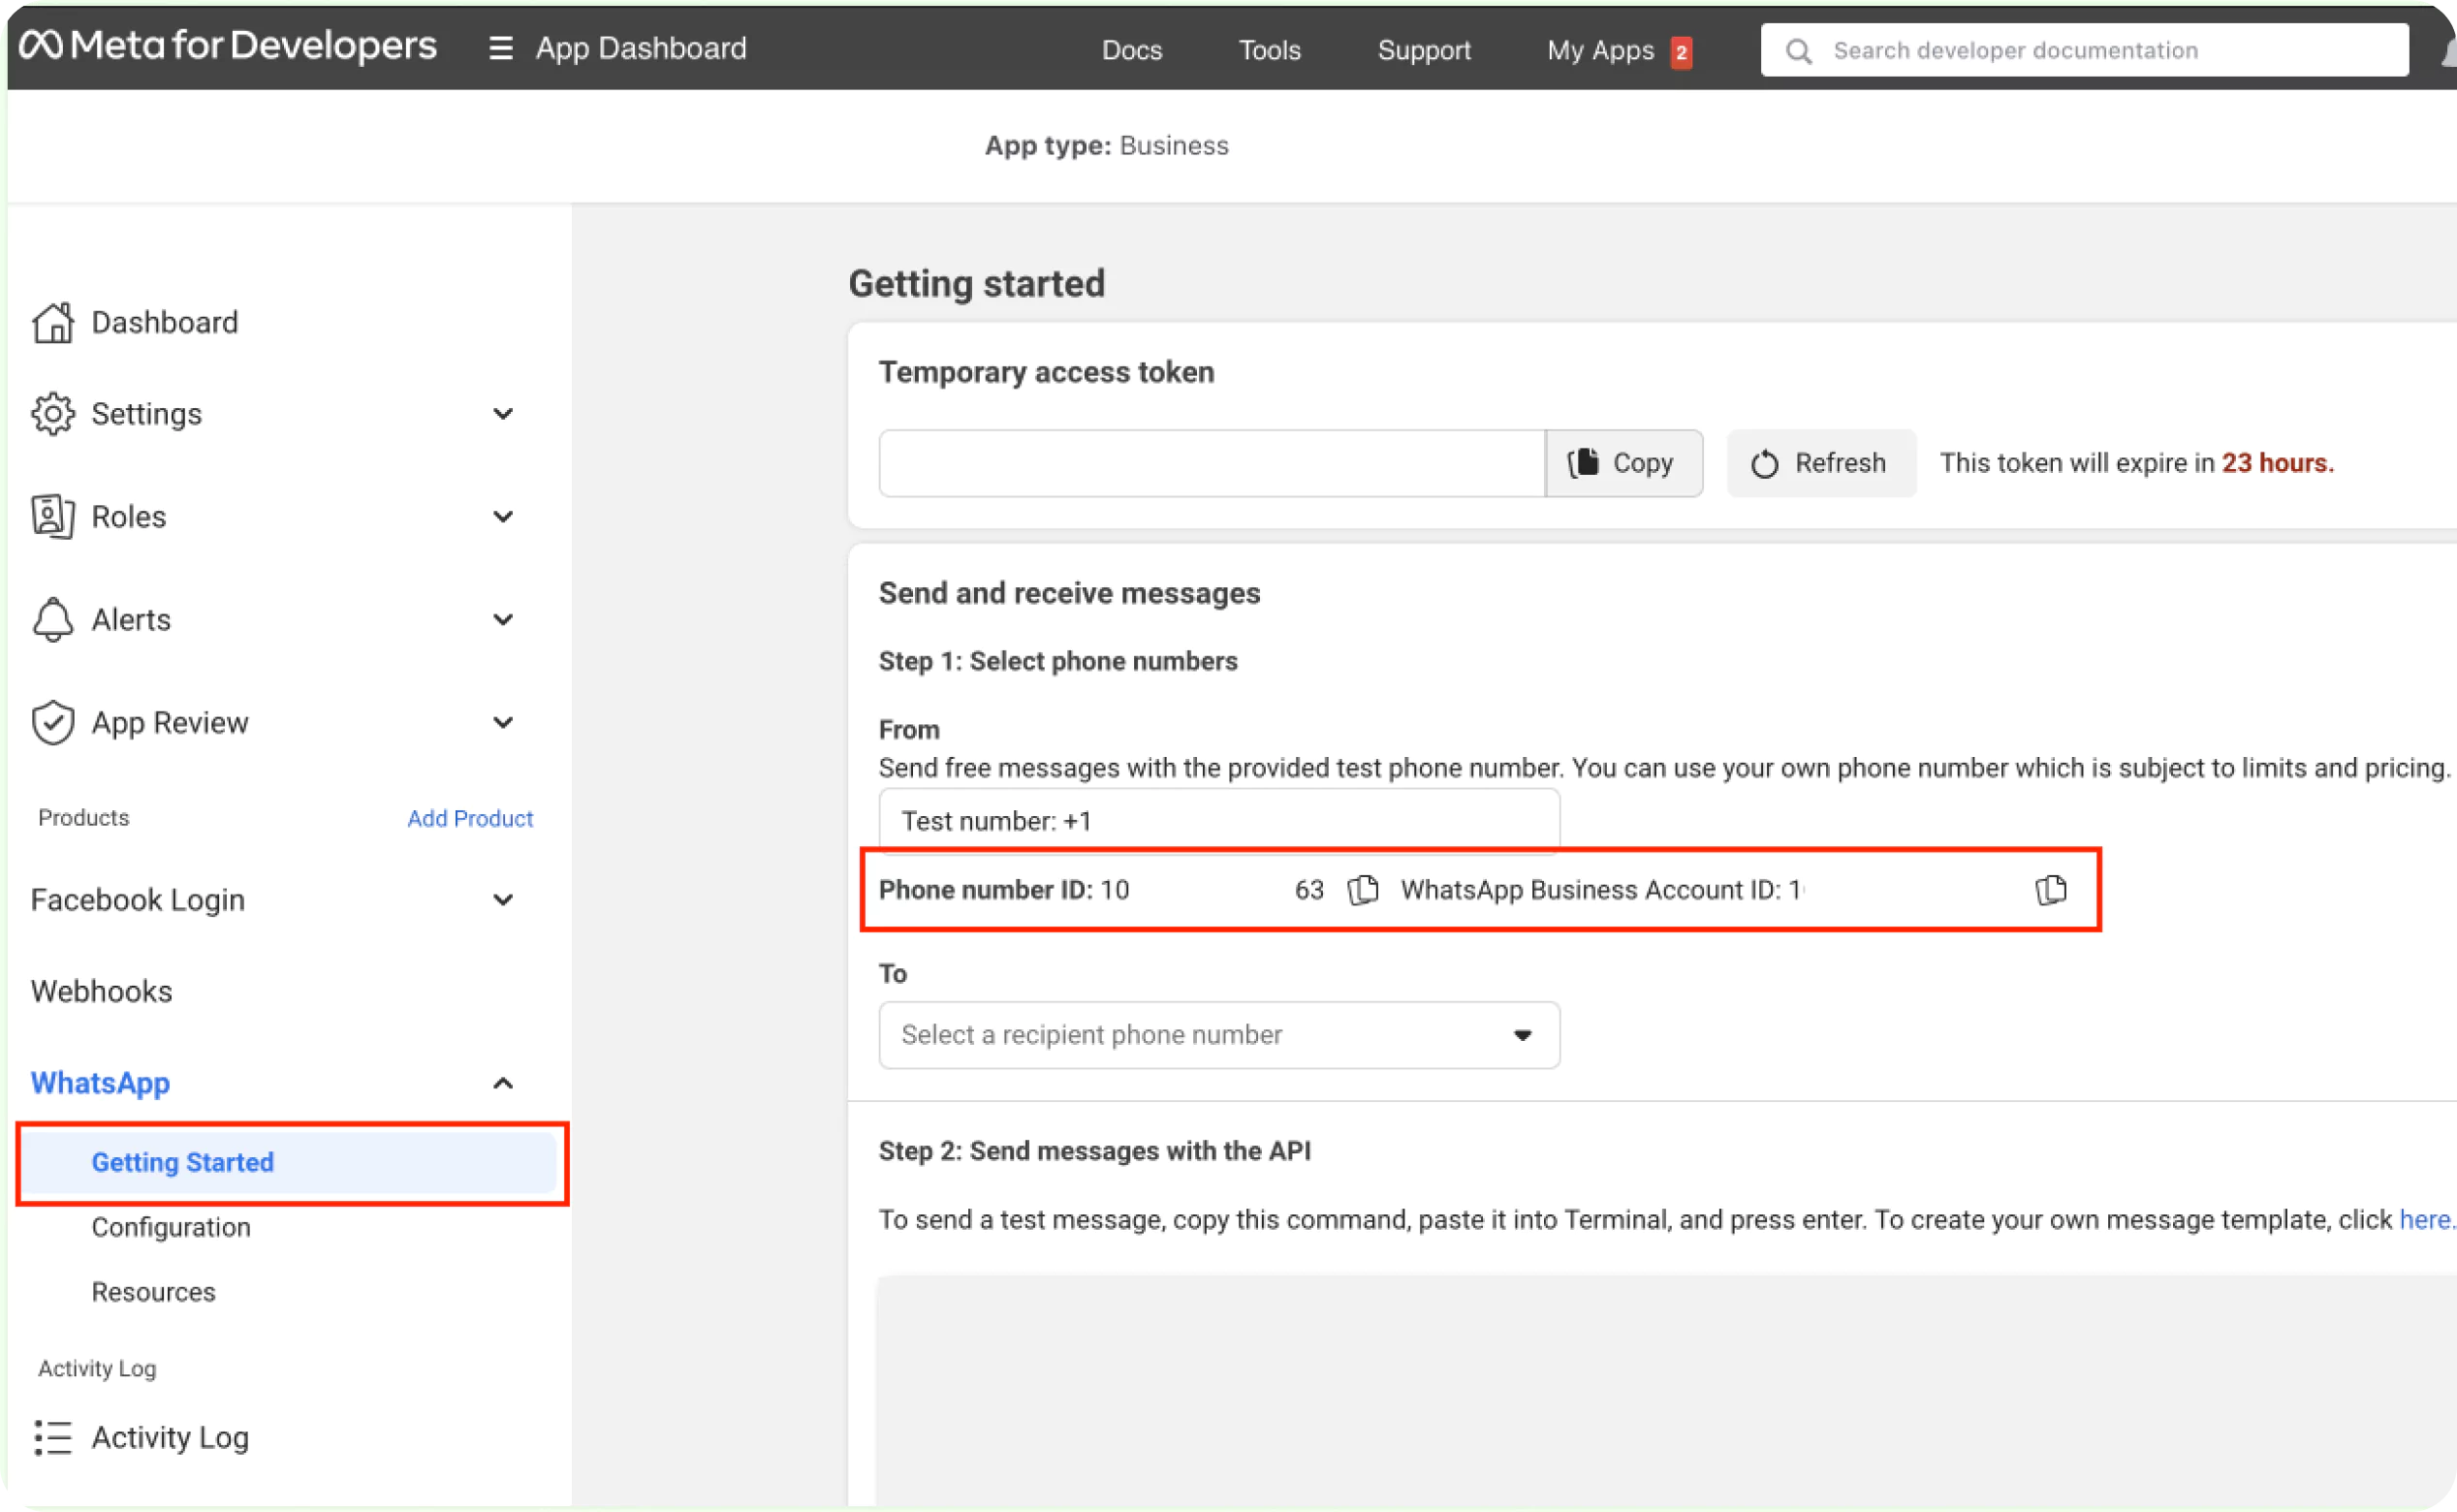
Once you finish this step, you can now configure your required phone numbers in the WhatsApp section of your Facebook developer app. If you complete the steps successfully, you should be able to obtain the Phone Number ID and Whatsapp Business Account ID, as shown in the below screenshot. Loggworks will require these values for creating the WhatsApp Inbox.
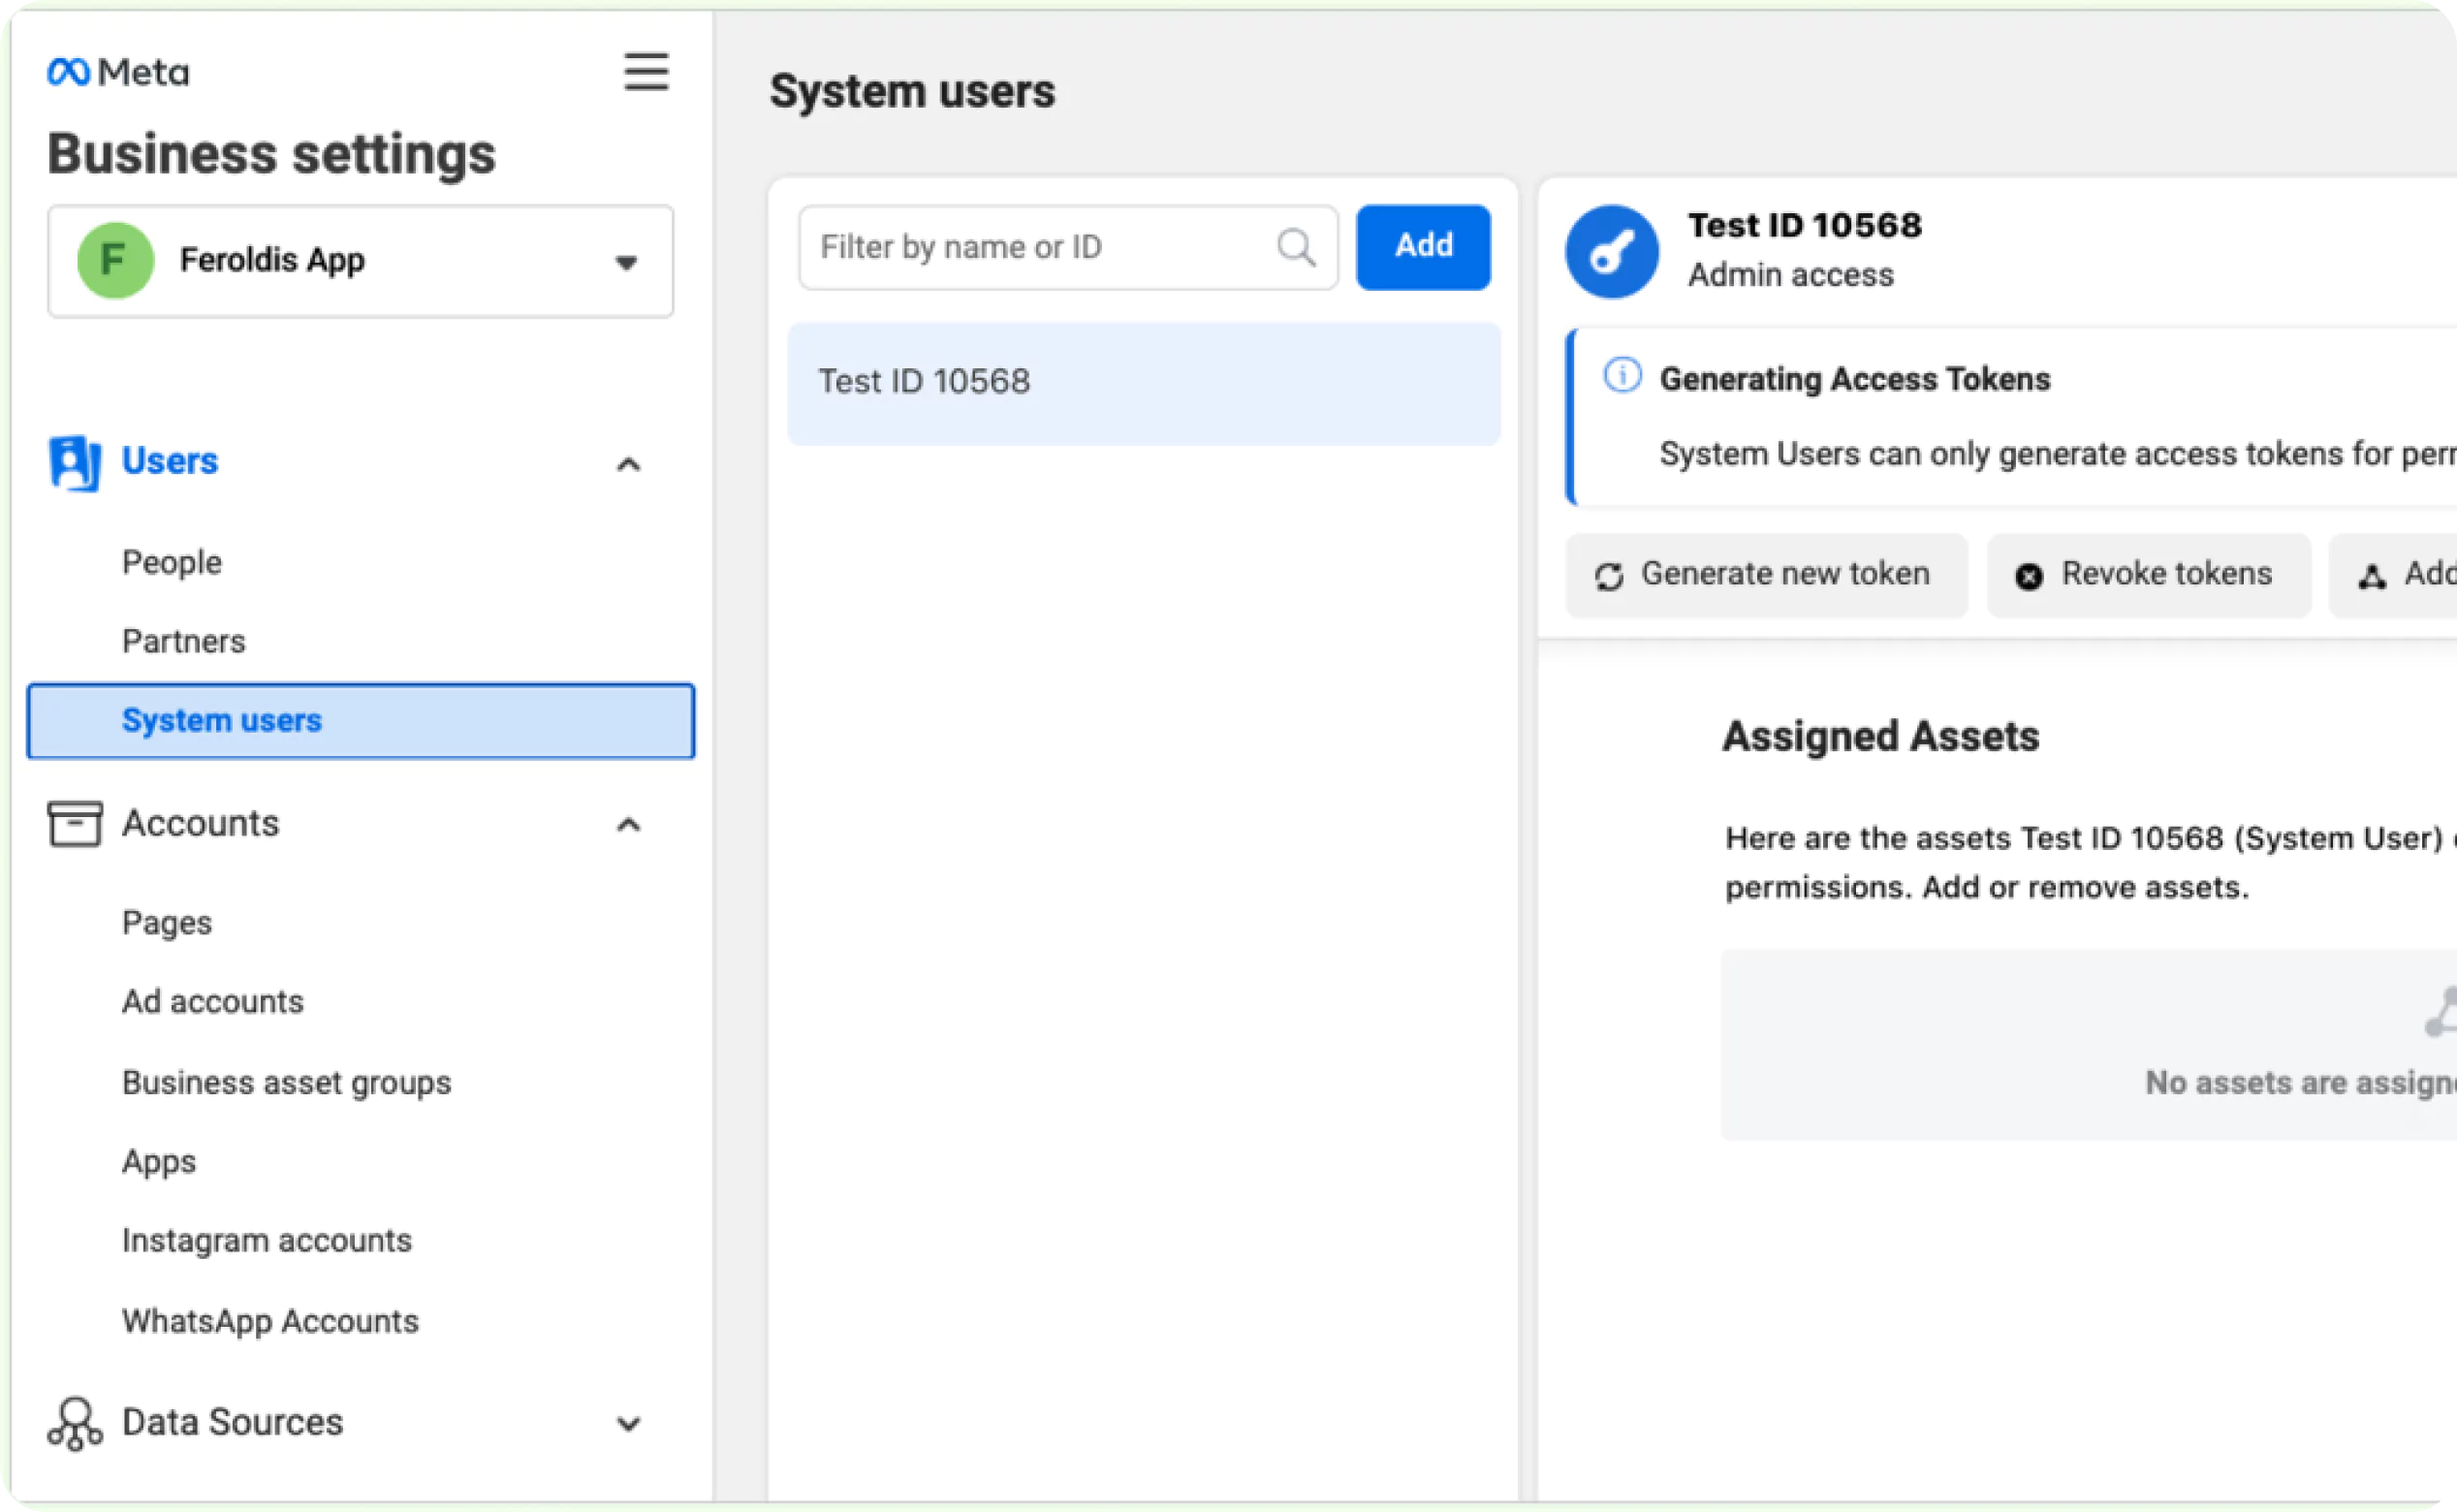
Create a system user in your Business Manager with access to the WhatsApp App. Generate an access token for the user, which will be required as the API key for setting up an inbox in Loggworks.
When generating the access token, make sure the whatsapp_business_management and whatsapp_business_messaging permissions are selected.
Step 1. Create a system user in the System Users tab of Business Manager.
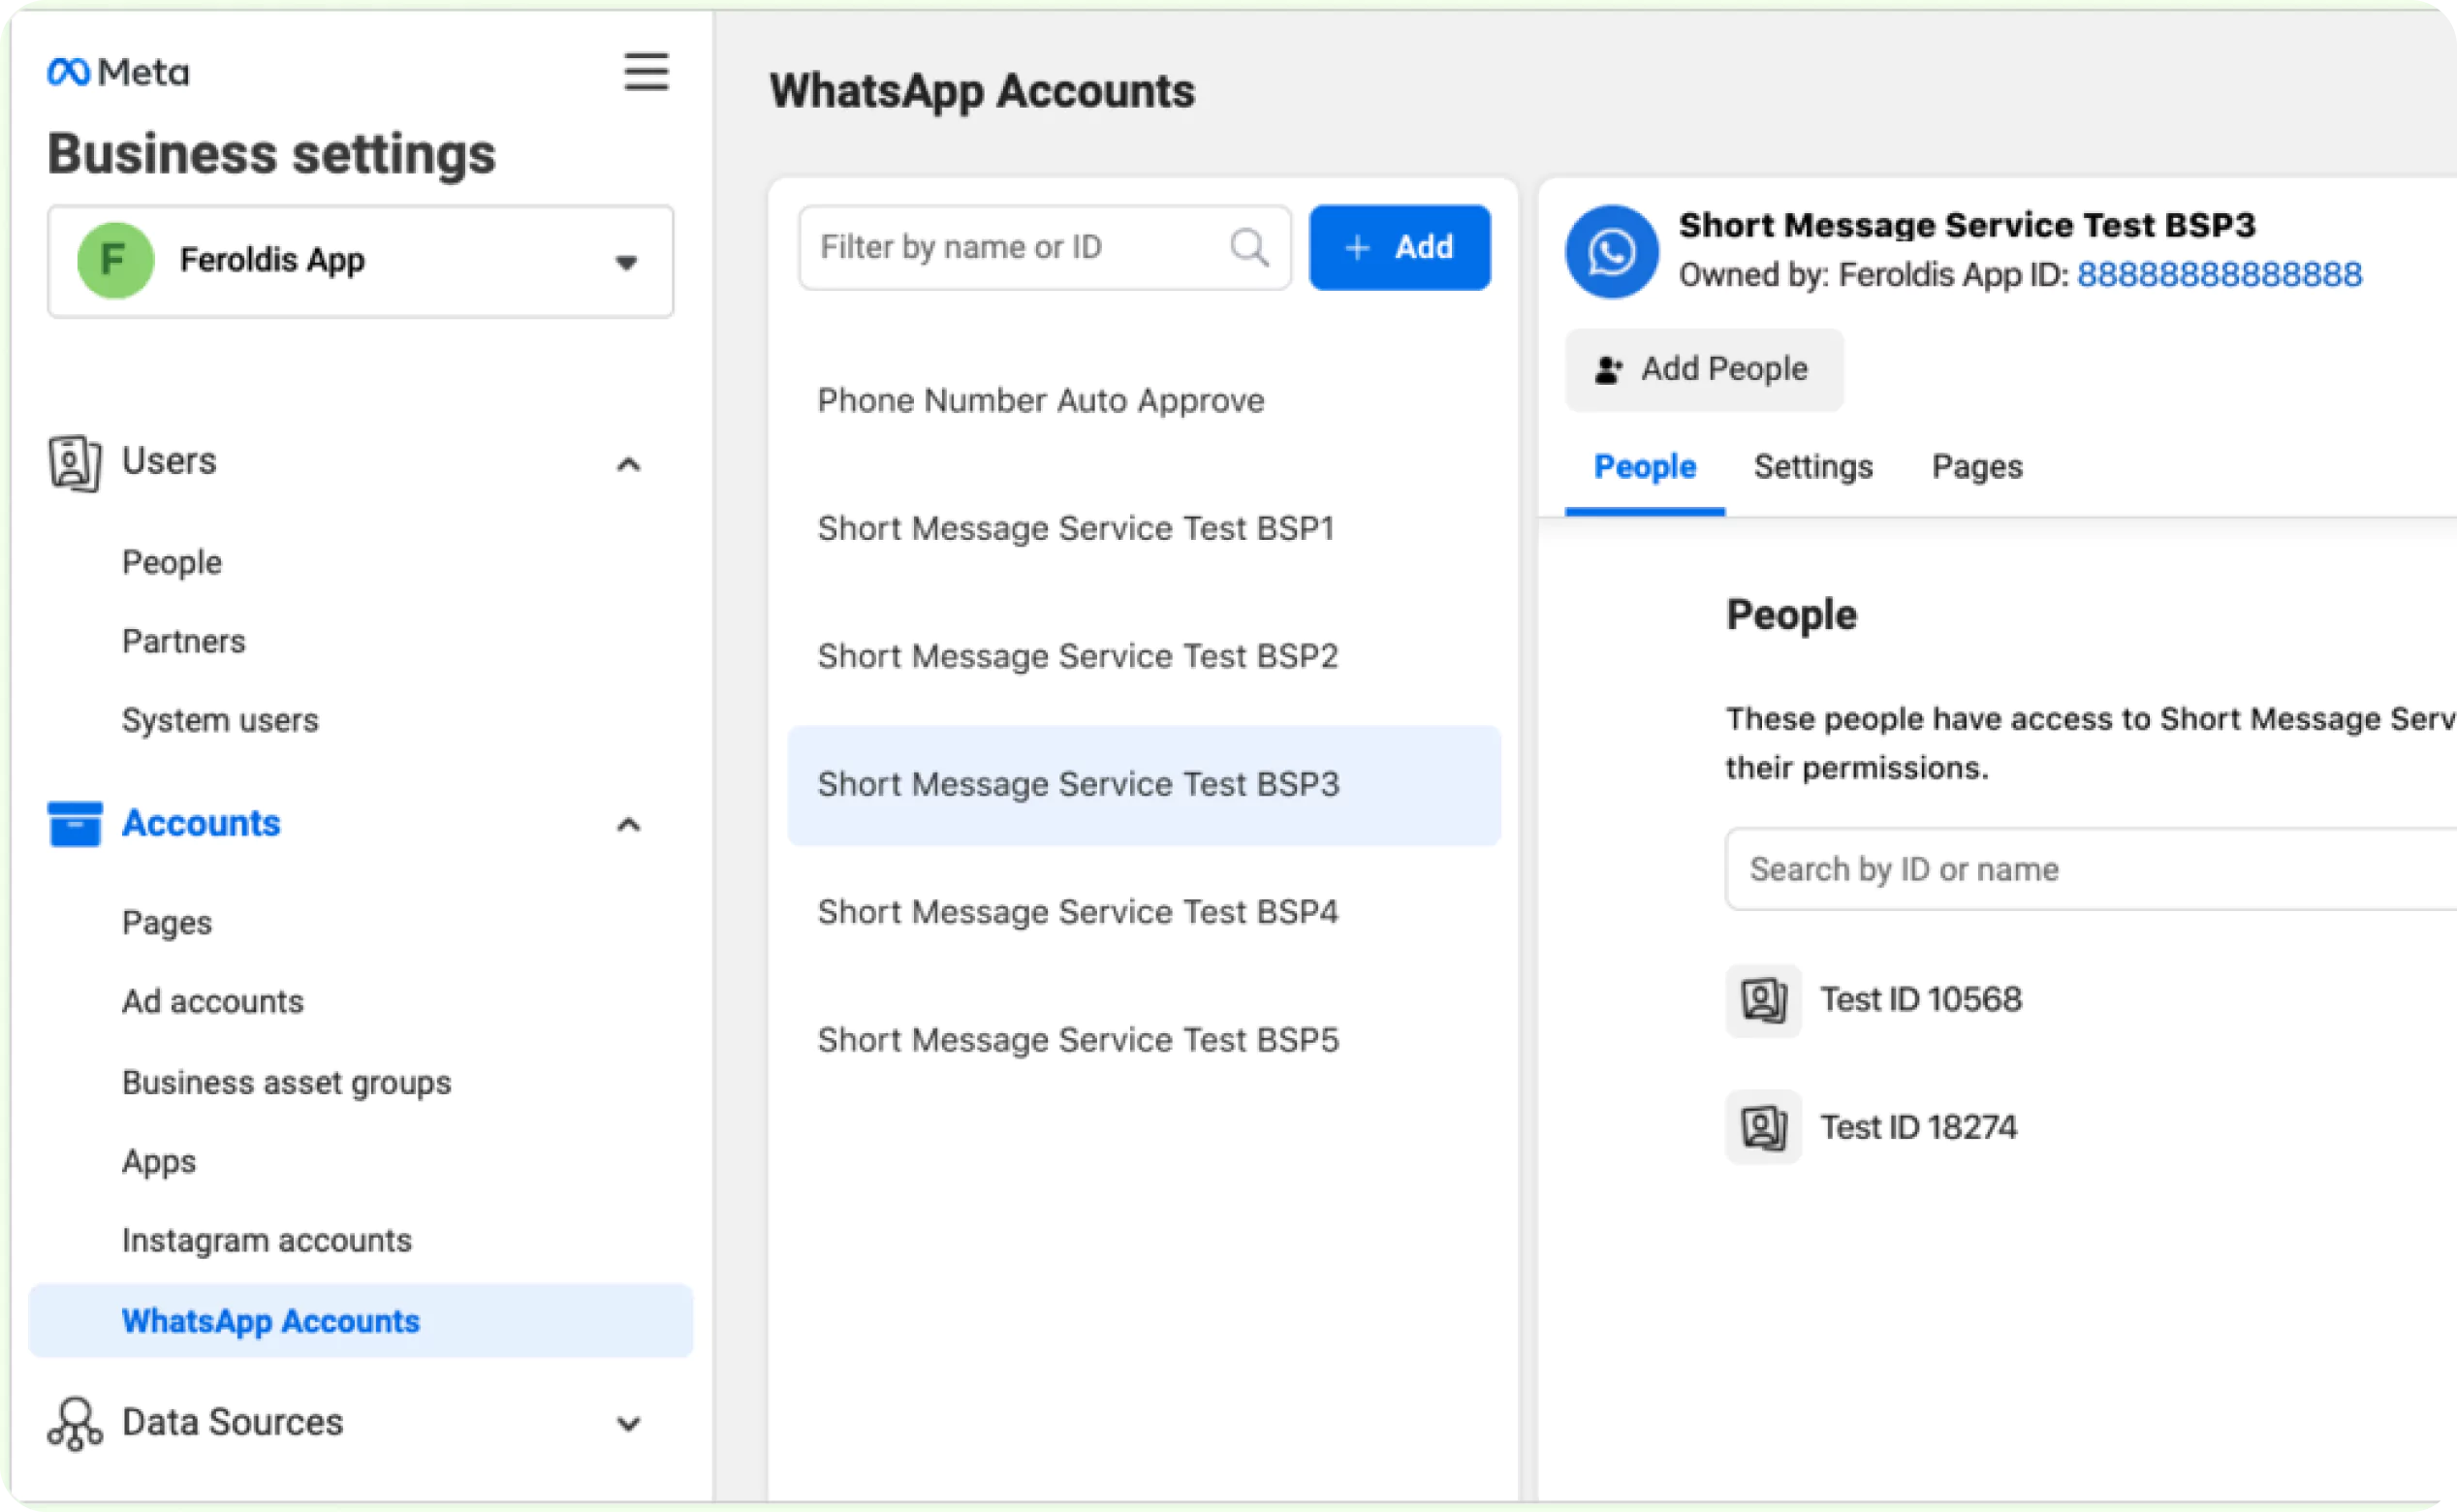
Step 2. Add the system user. Under the WhatsApp Accounts tab, select “Add People” and select the system user to grant access to the WhatsApp Business account.
Step 3. Generate the access token and request permissions.
Refer to this video for detailed steps.
If your prerequisites are met, you can create your WhatsApp inbox in Loggworks. Follow the steps outlined below.
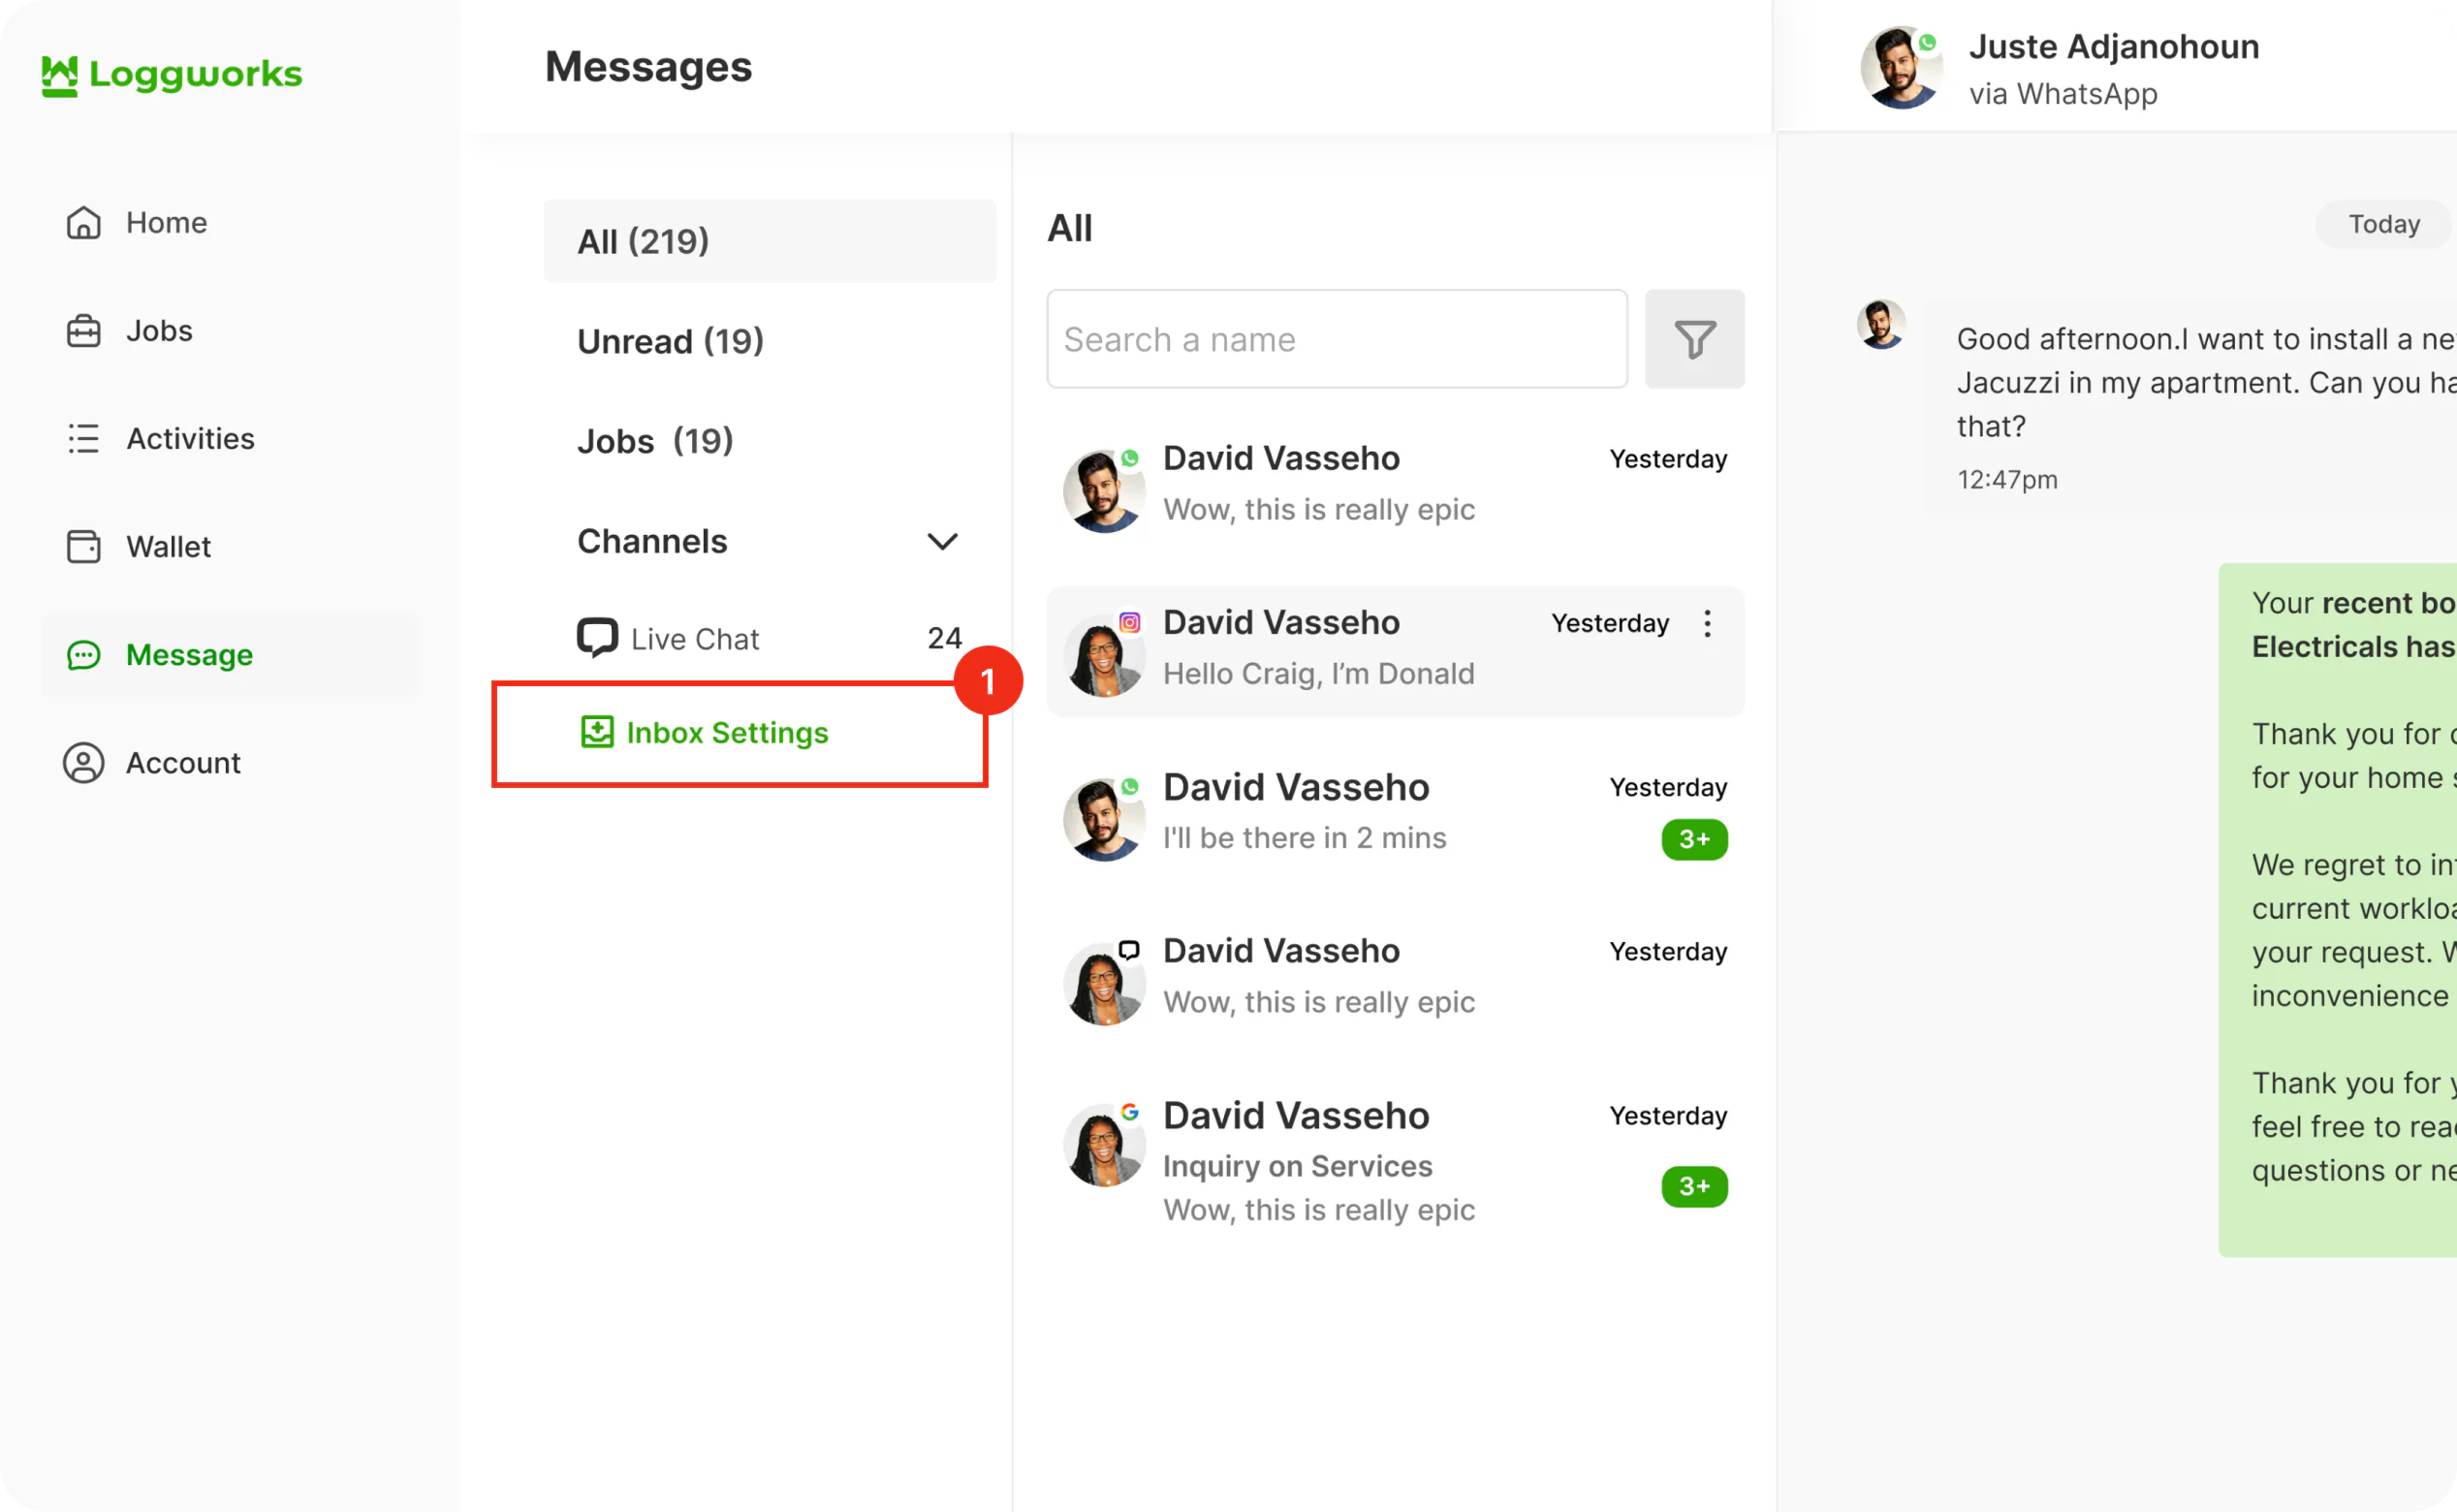
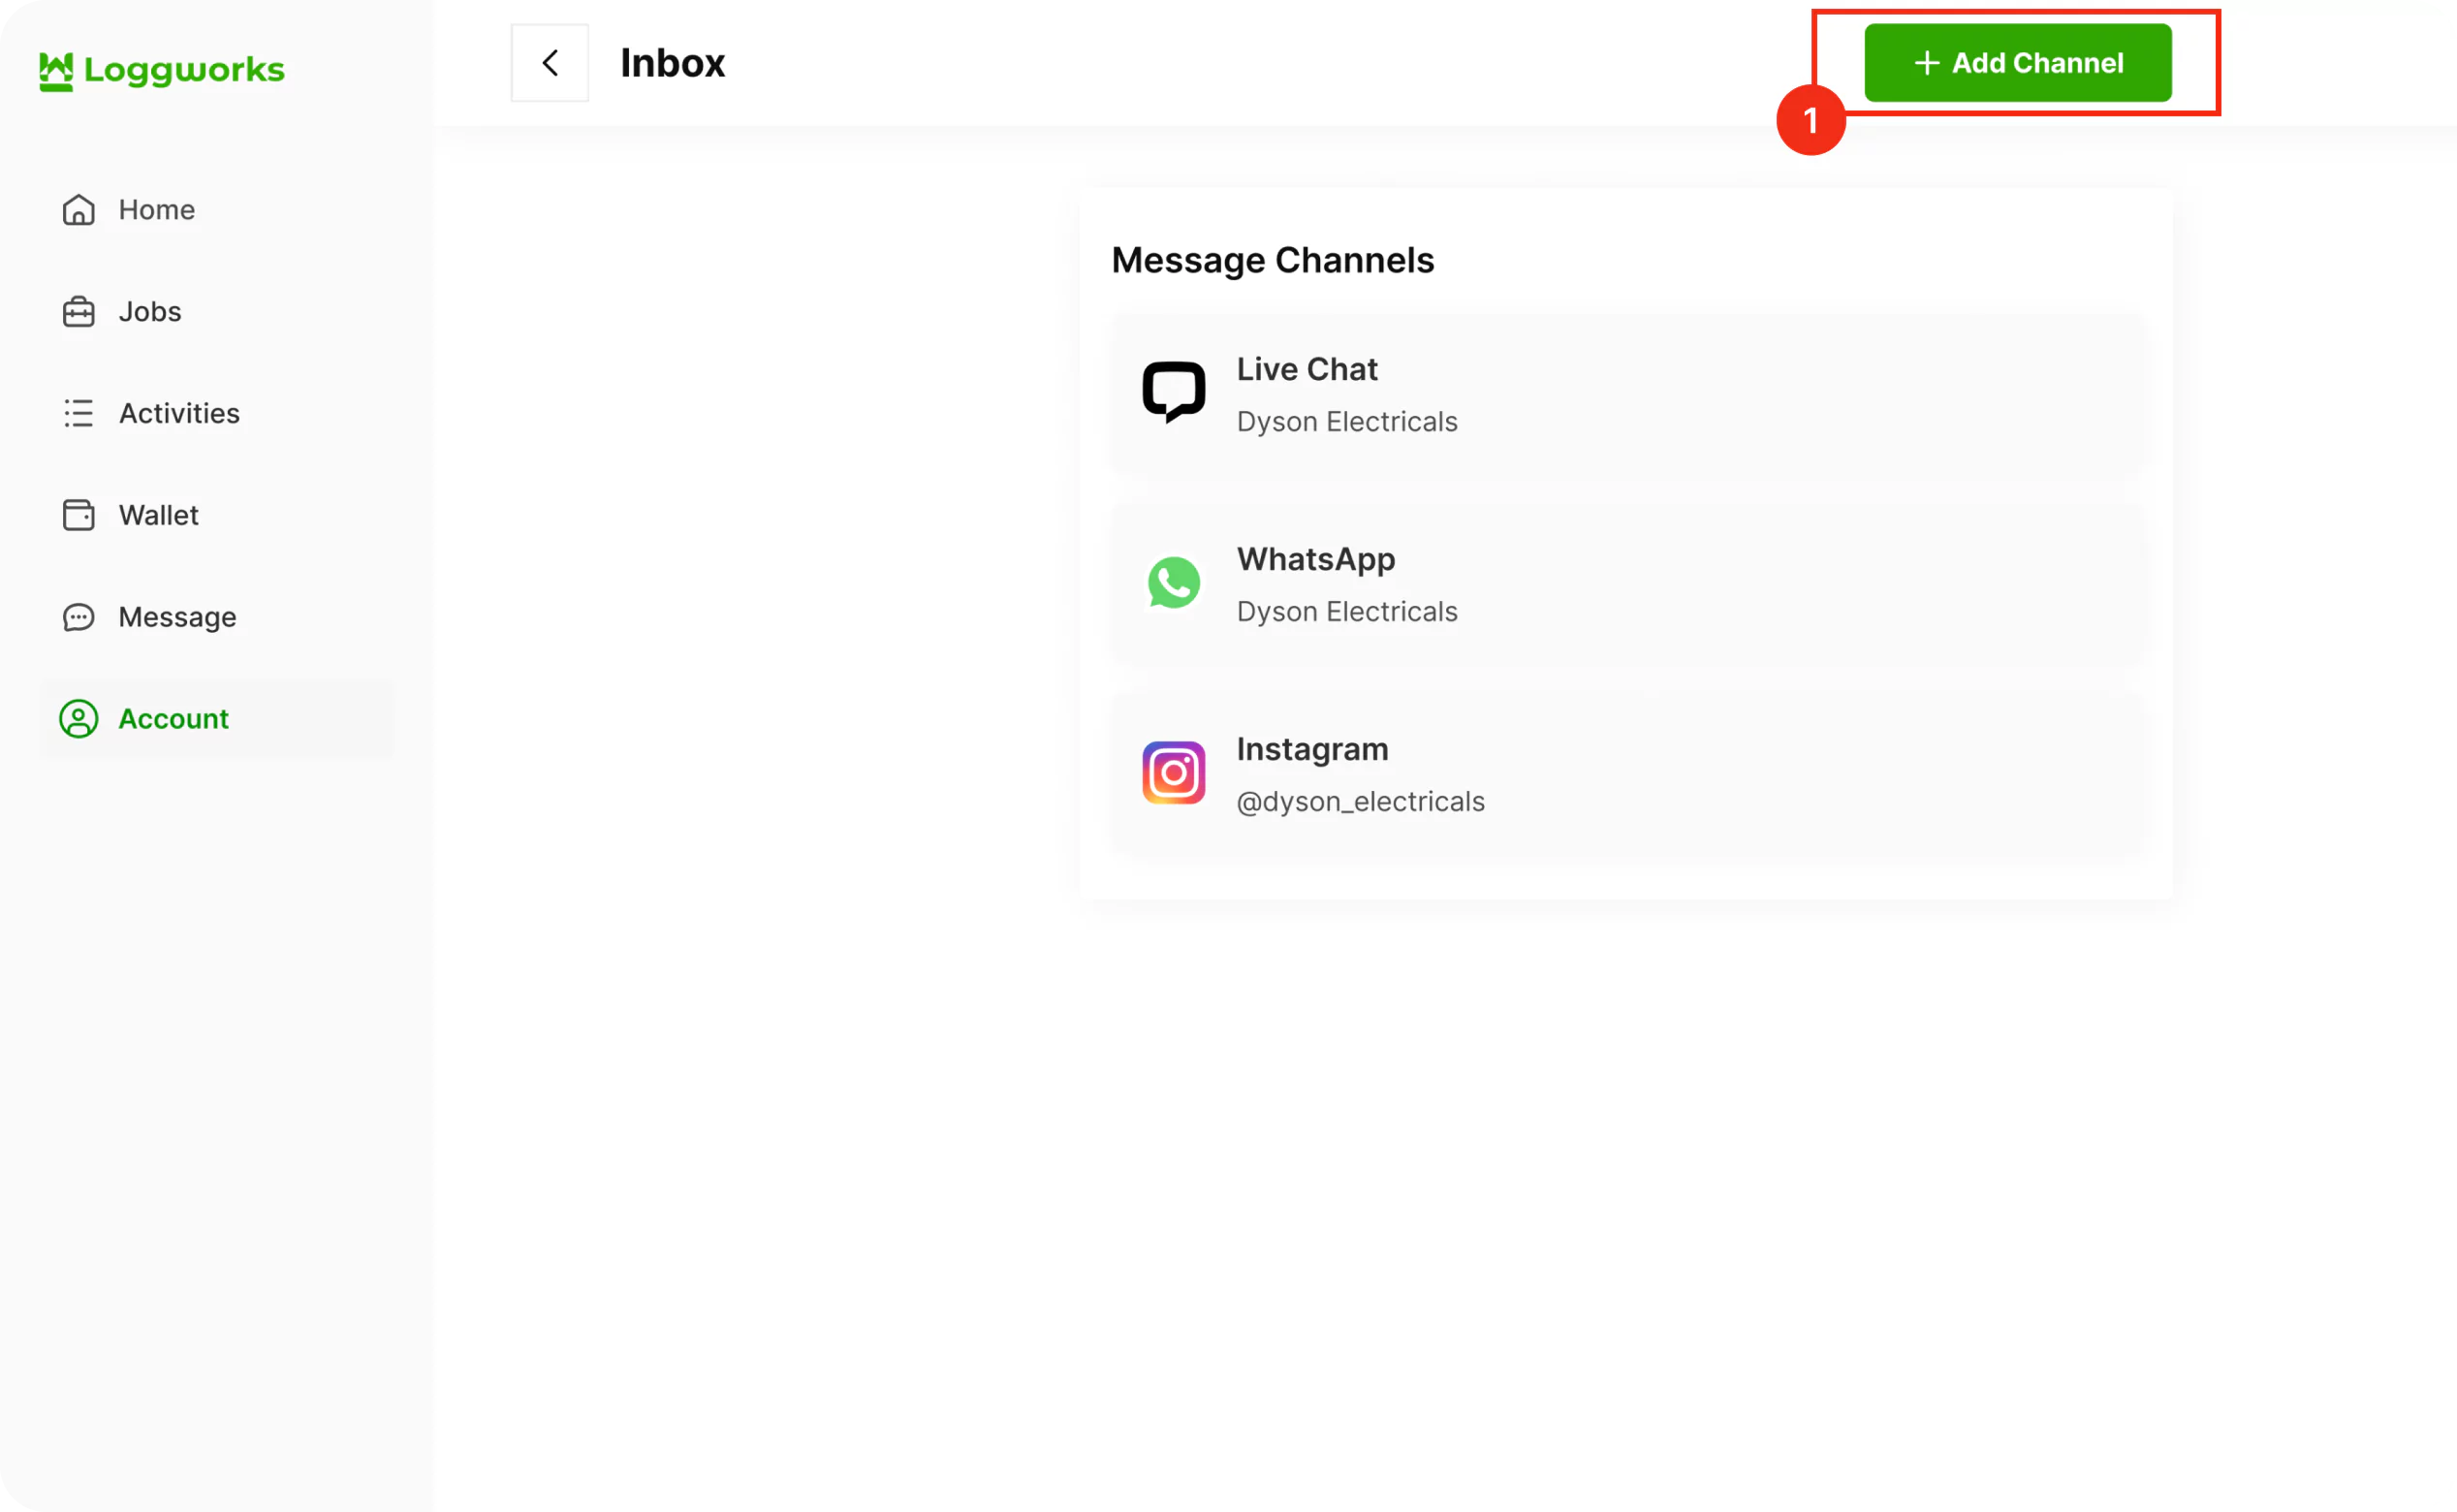
Step 1.Open your Loggworks dashboard. Go to Messages → Inbox Settings → Add channels
Step 2. Click on the “WhatsApp” icon.

Step 3. Choose WhatsApp Cloud API as your API provider. Based on your selection, you will see a different set of fields to be filled. Let us learn about each of them.
Choose "WhatsApp Cloud" as the API provider.
The fields, as seen in this selection, are explained below.
| Values | Description |
|---|---|
| Name | Choose a name for your inbox. E.g. Your Business Name |
| Phone Number | Fill in the phone number you have configures in Facebook Developer App |
| Phone Number ID | The phone number ID for the number as obtained in prerequisites |
| Business Account ID | The Business Account ID for the number as obtained in prerequisites |
| API Key | The Business Account User’s access token for the number as obtained in prerequisites |
| Webhook Verify Token | This token is required while configuring Webhook in Facebook Developer App. Fill in a secure alphanumeric string that you wish |
Finish the steps to obtain your WhatsAppWebhook Callback URL.
Configure the webhook in Facebook Developer App.
Head back to the WhatsApp section in the Facebook Developer App. Navigate to the Configuration subsection and set up theCallback URL.
You should also subscribe to message field events on your Facebook Developer app under Webhooks Fields.
Once you finish all the steps, the section should look like the screenshot.
Once you finish all the steps, the section should look like the screenshot.Your freshly configured WhatsApp inbox should now appear in your list of inboxes. To see this and to make additional settings in your WhatsApp inbox, go to Settings → Inboxes → click the gear icon on the associated WhatsApp inbox.
All the Additional Settings available are the same as those in your Twitter inbox. We recommend going through this link to understand the same.
Your WhatsApp inbox supports various media types, as summarised below.
This guide will take you through how to manage your Instagram messages from Loggworks.
Last updated on Feb 29, 2024
©Copyright 2024 loggwork Ltd. All Rights Reserved