
Products Solutions Loggworks Resources Follow us
Last updated on Feb 29, 2024
This guide will take you through how to manage your Facebook conversations from Loggworks.
For the cloud version of Loggworks, please follow the steps below.
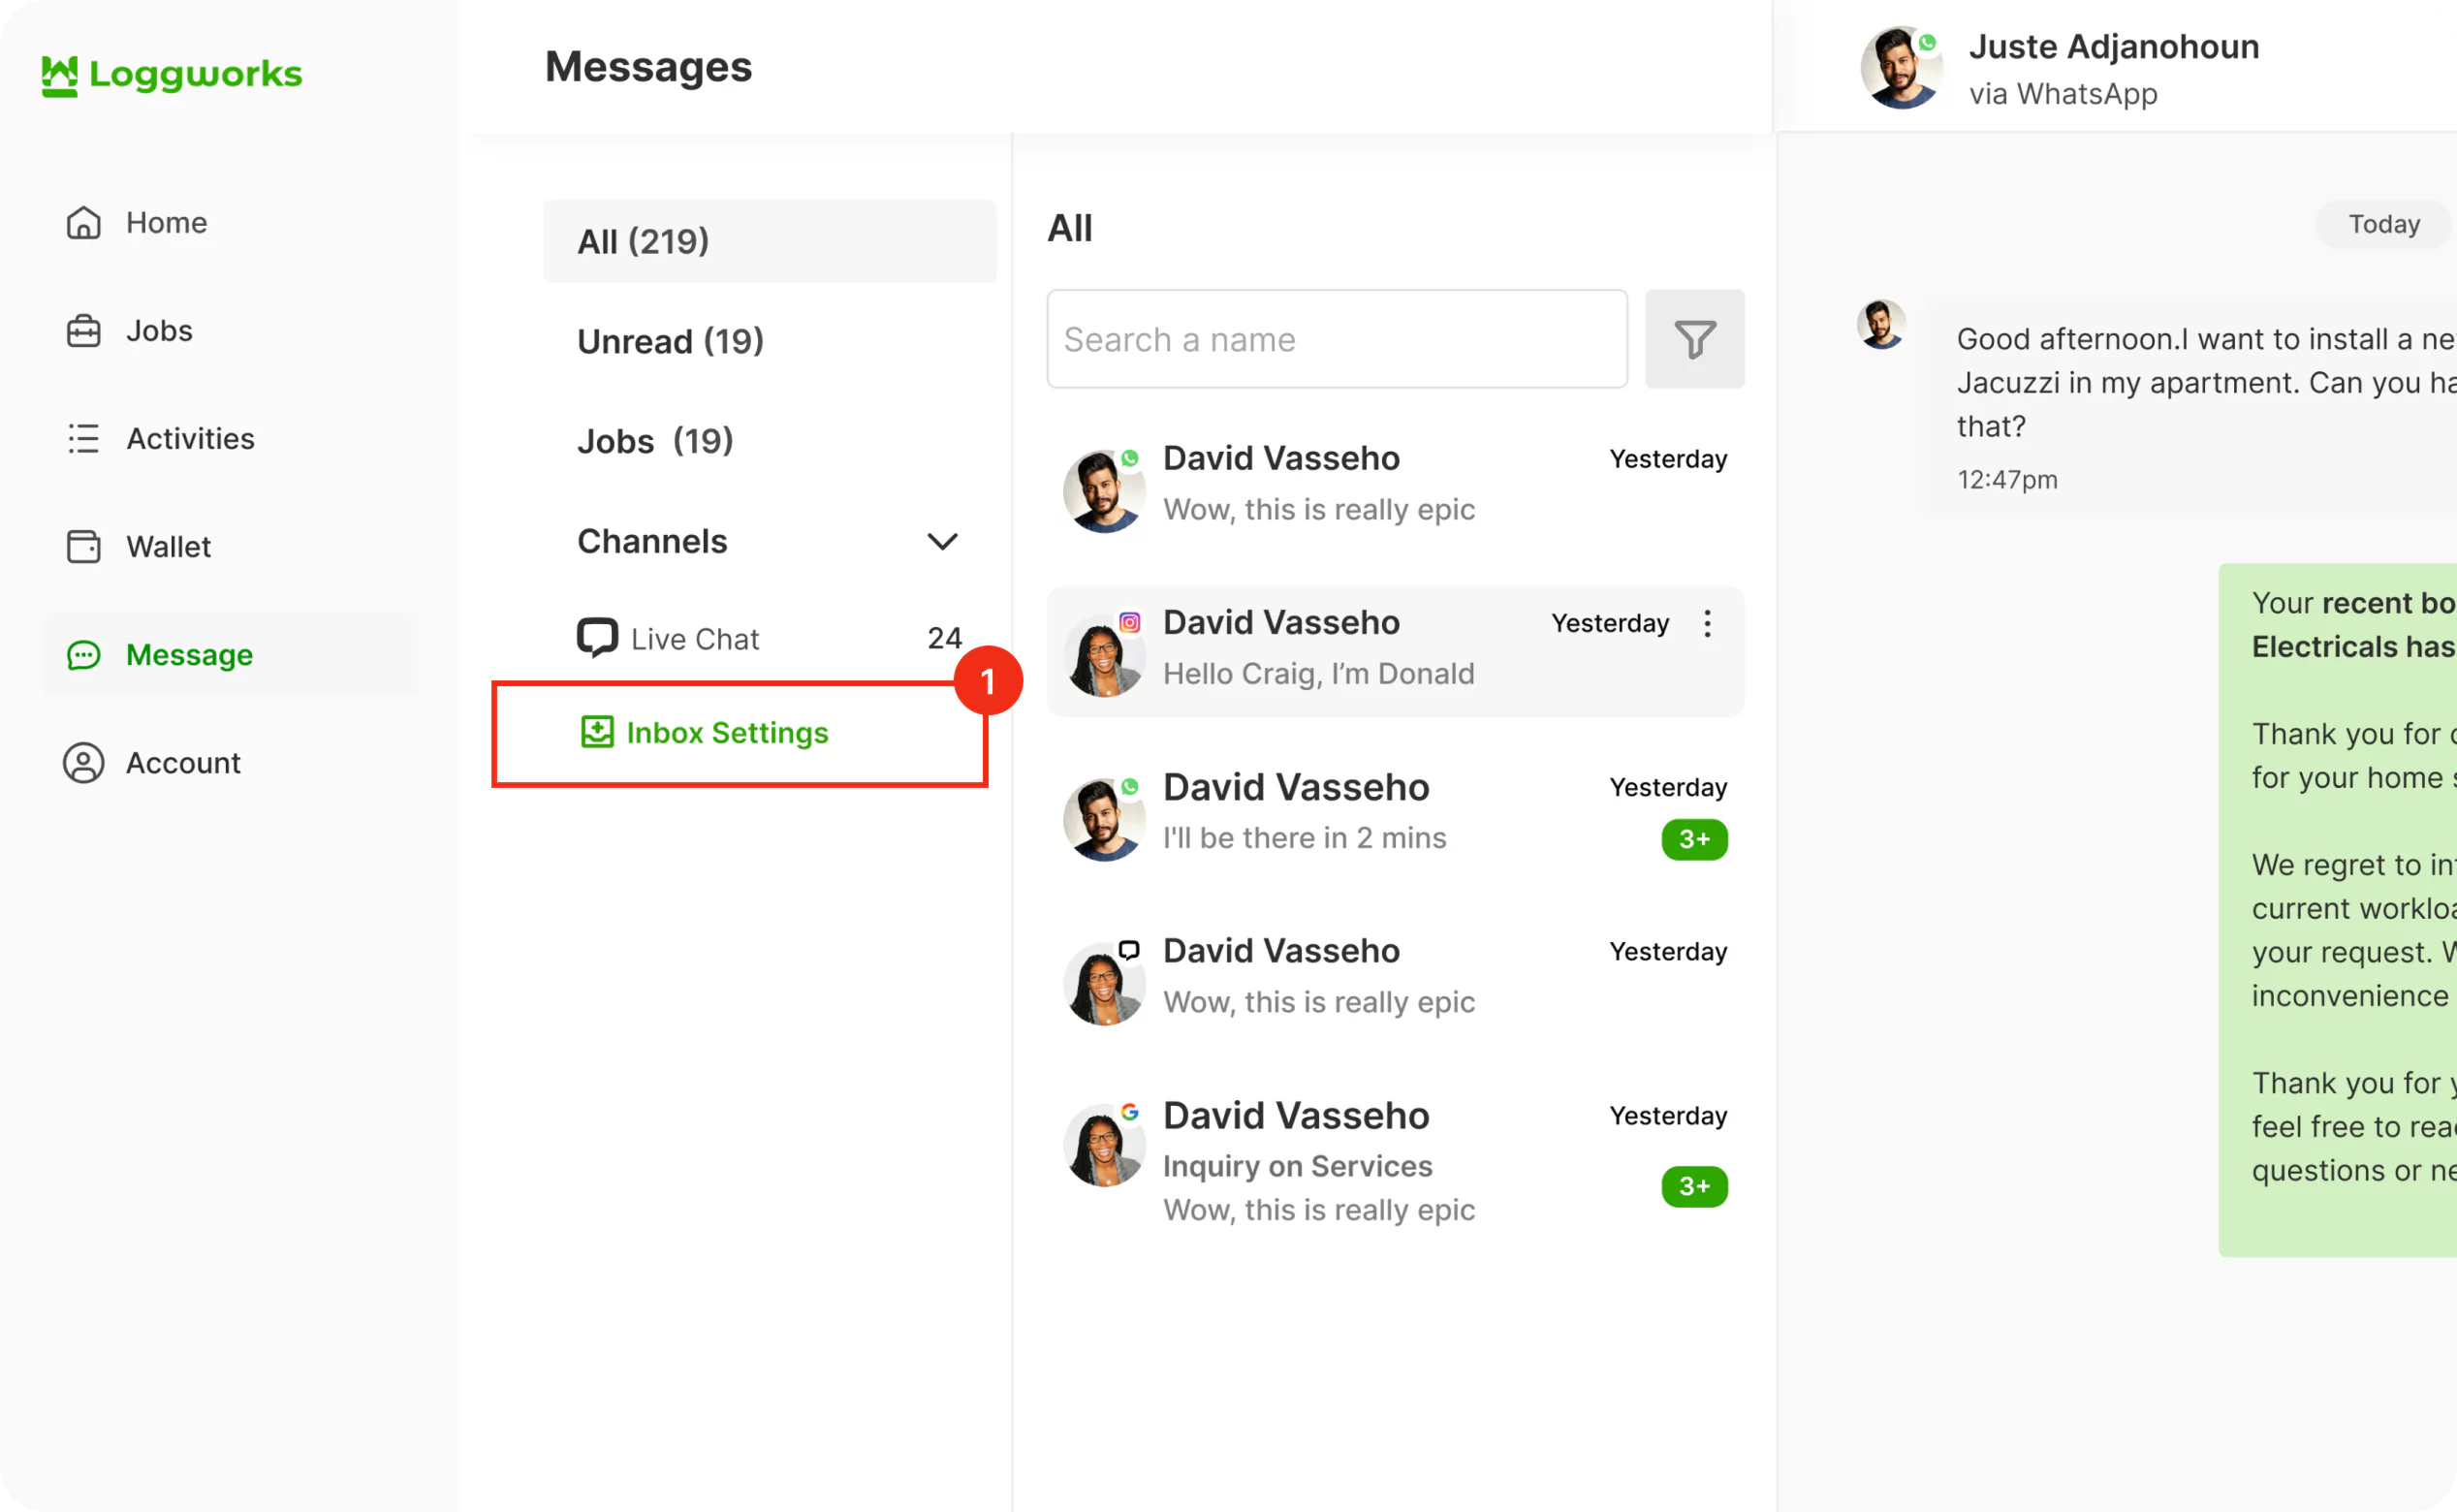
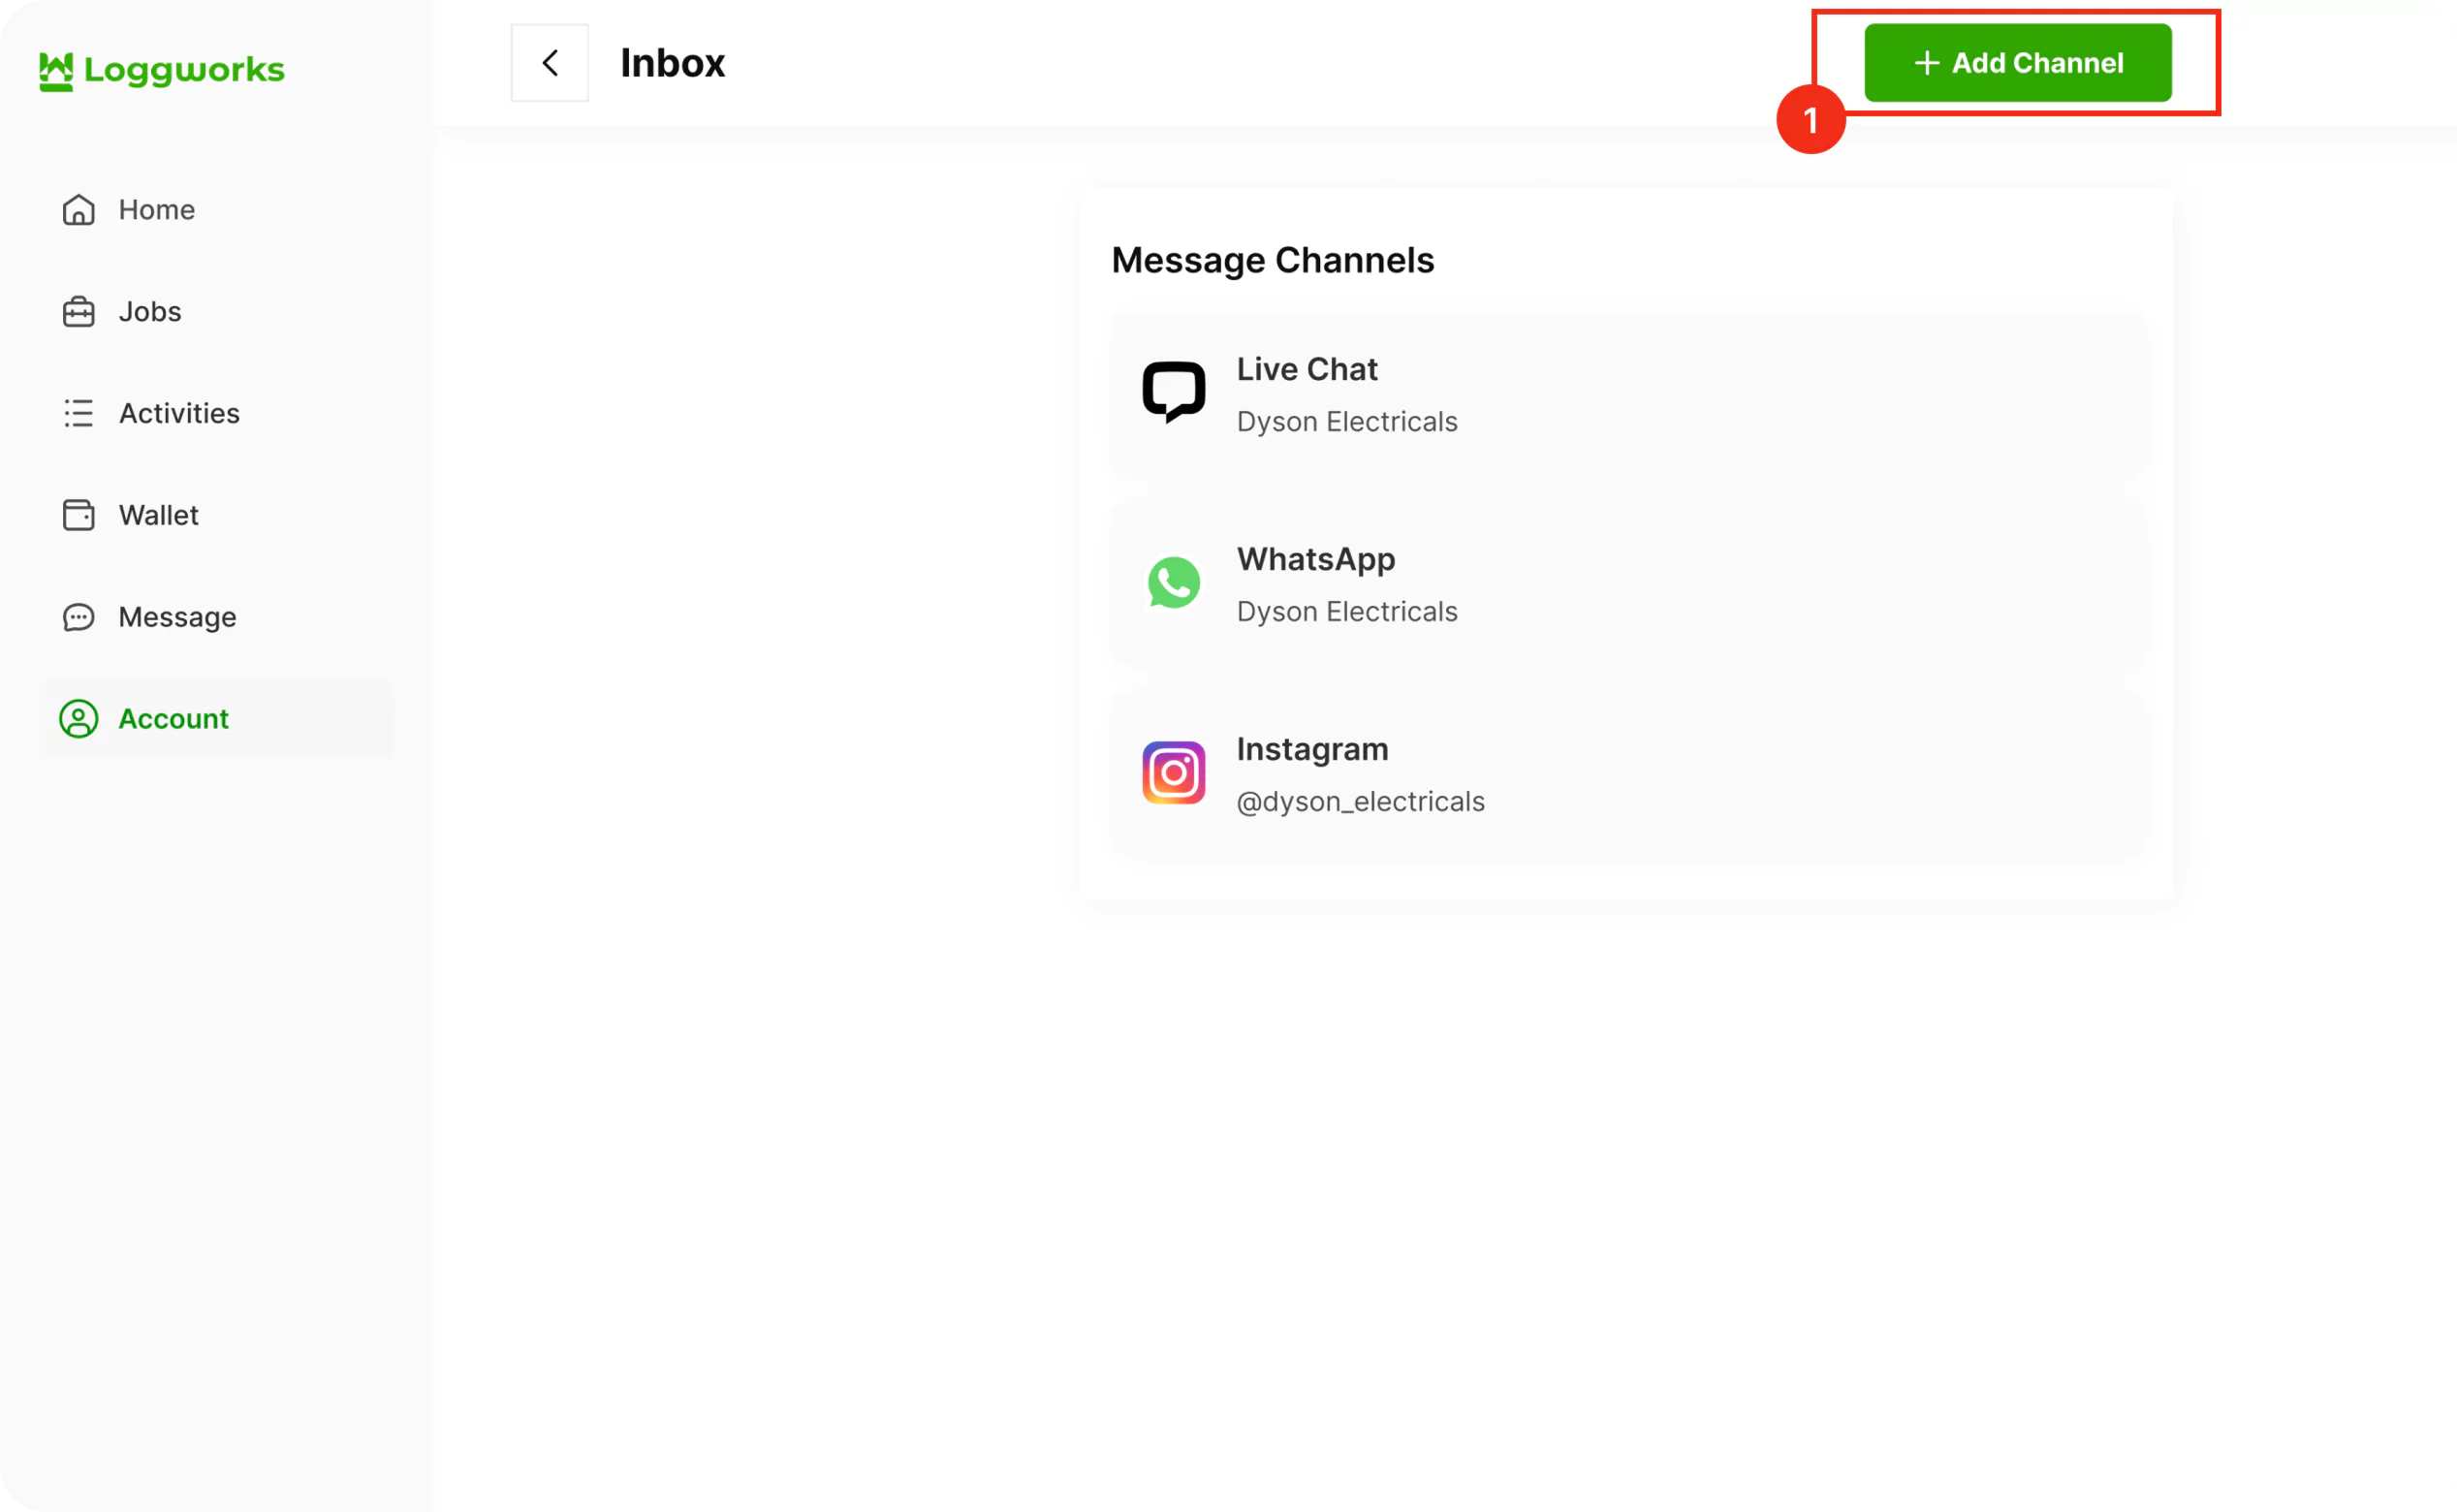
Step 1. Open your Loggworks dashboard. Go to Messages → Inbox Settings → Add channels
Step 2. Click on the “Create a Quote” icon.
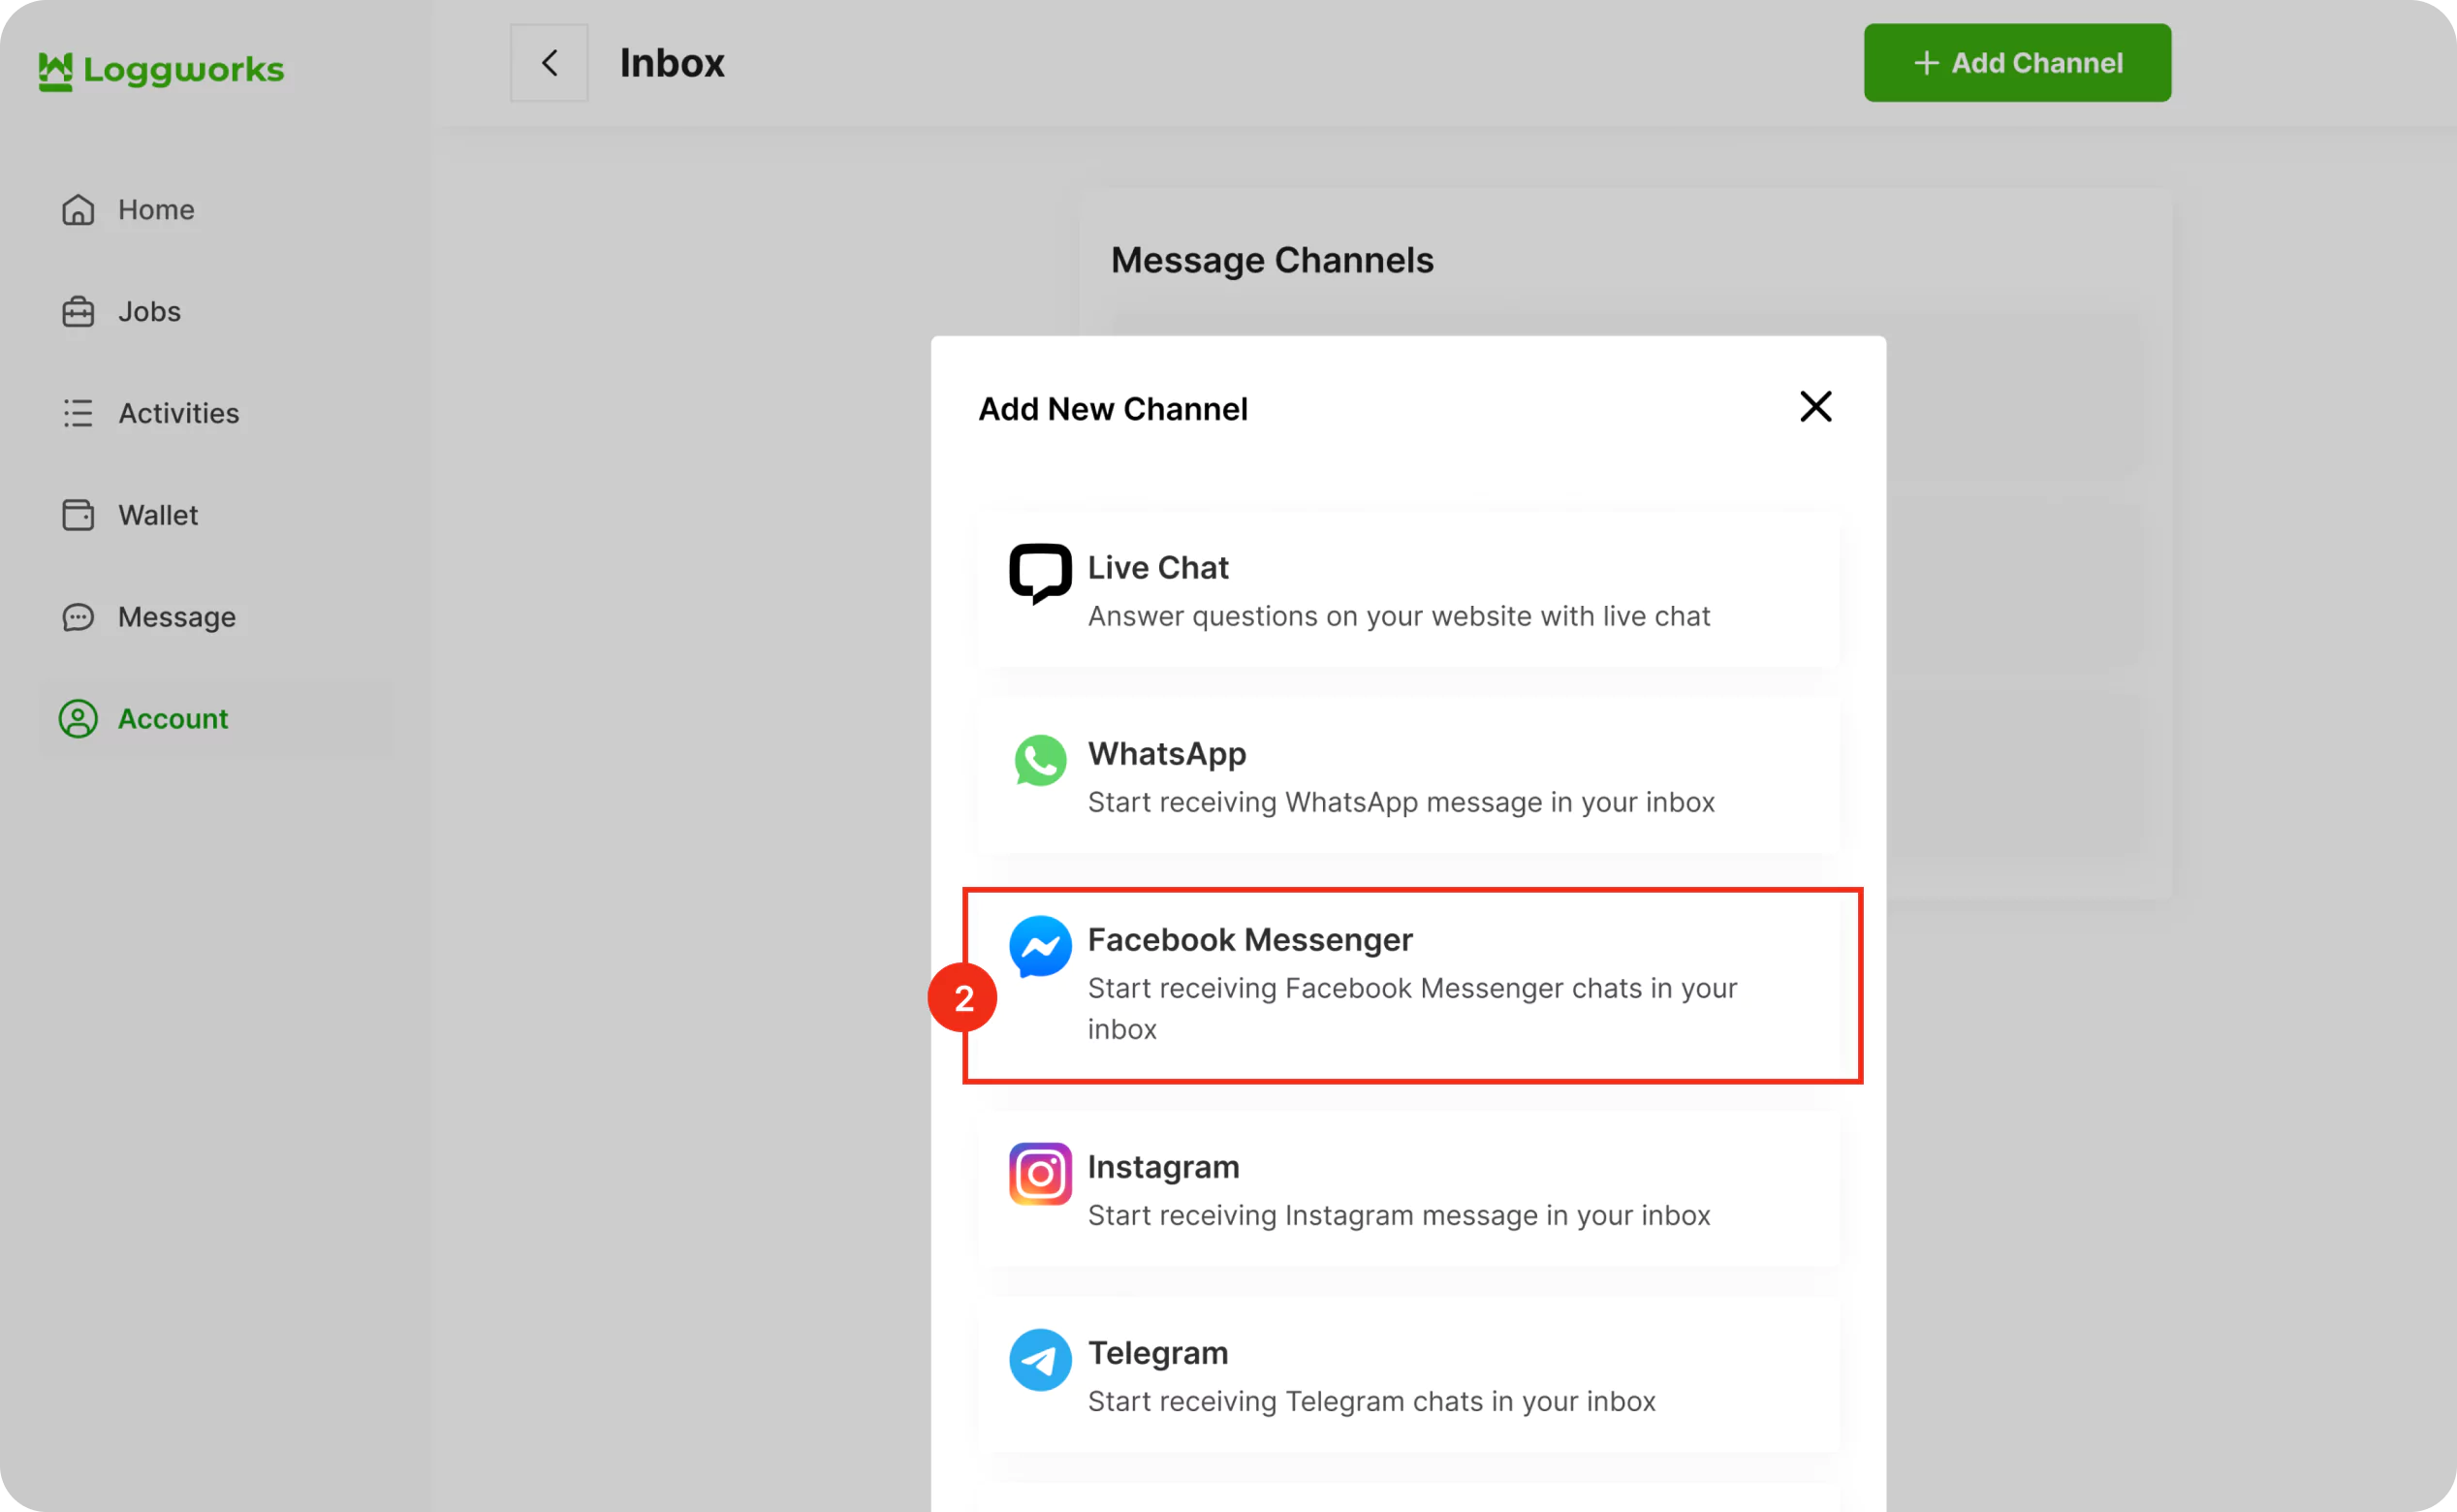
Step 3. Click the “Continue with Facebook” button. It will open a new window for you to login.
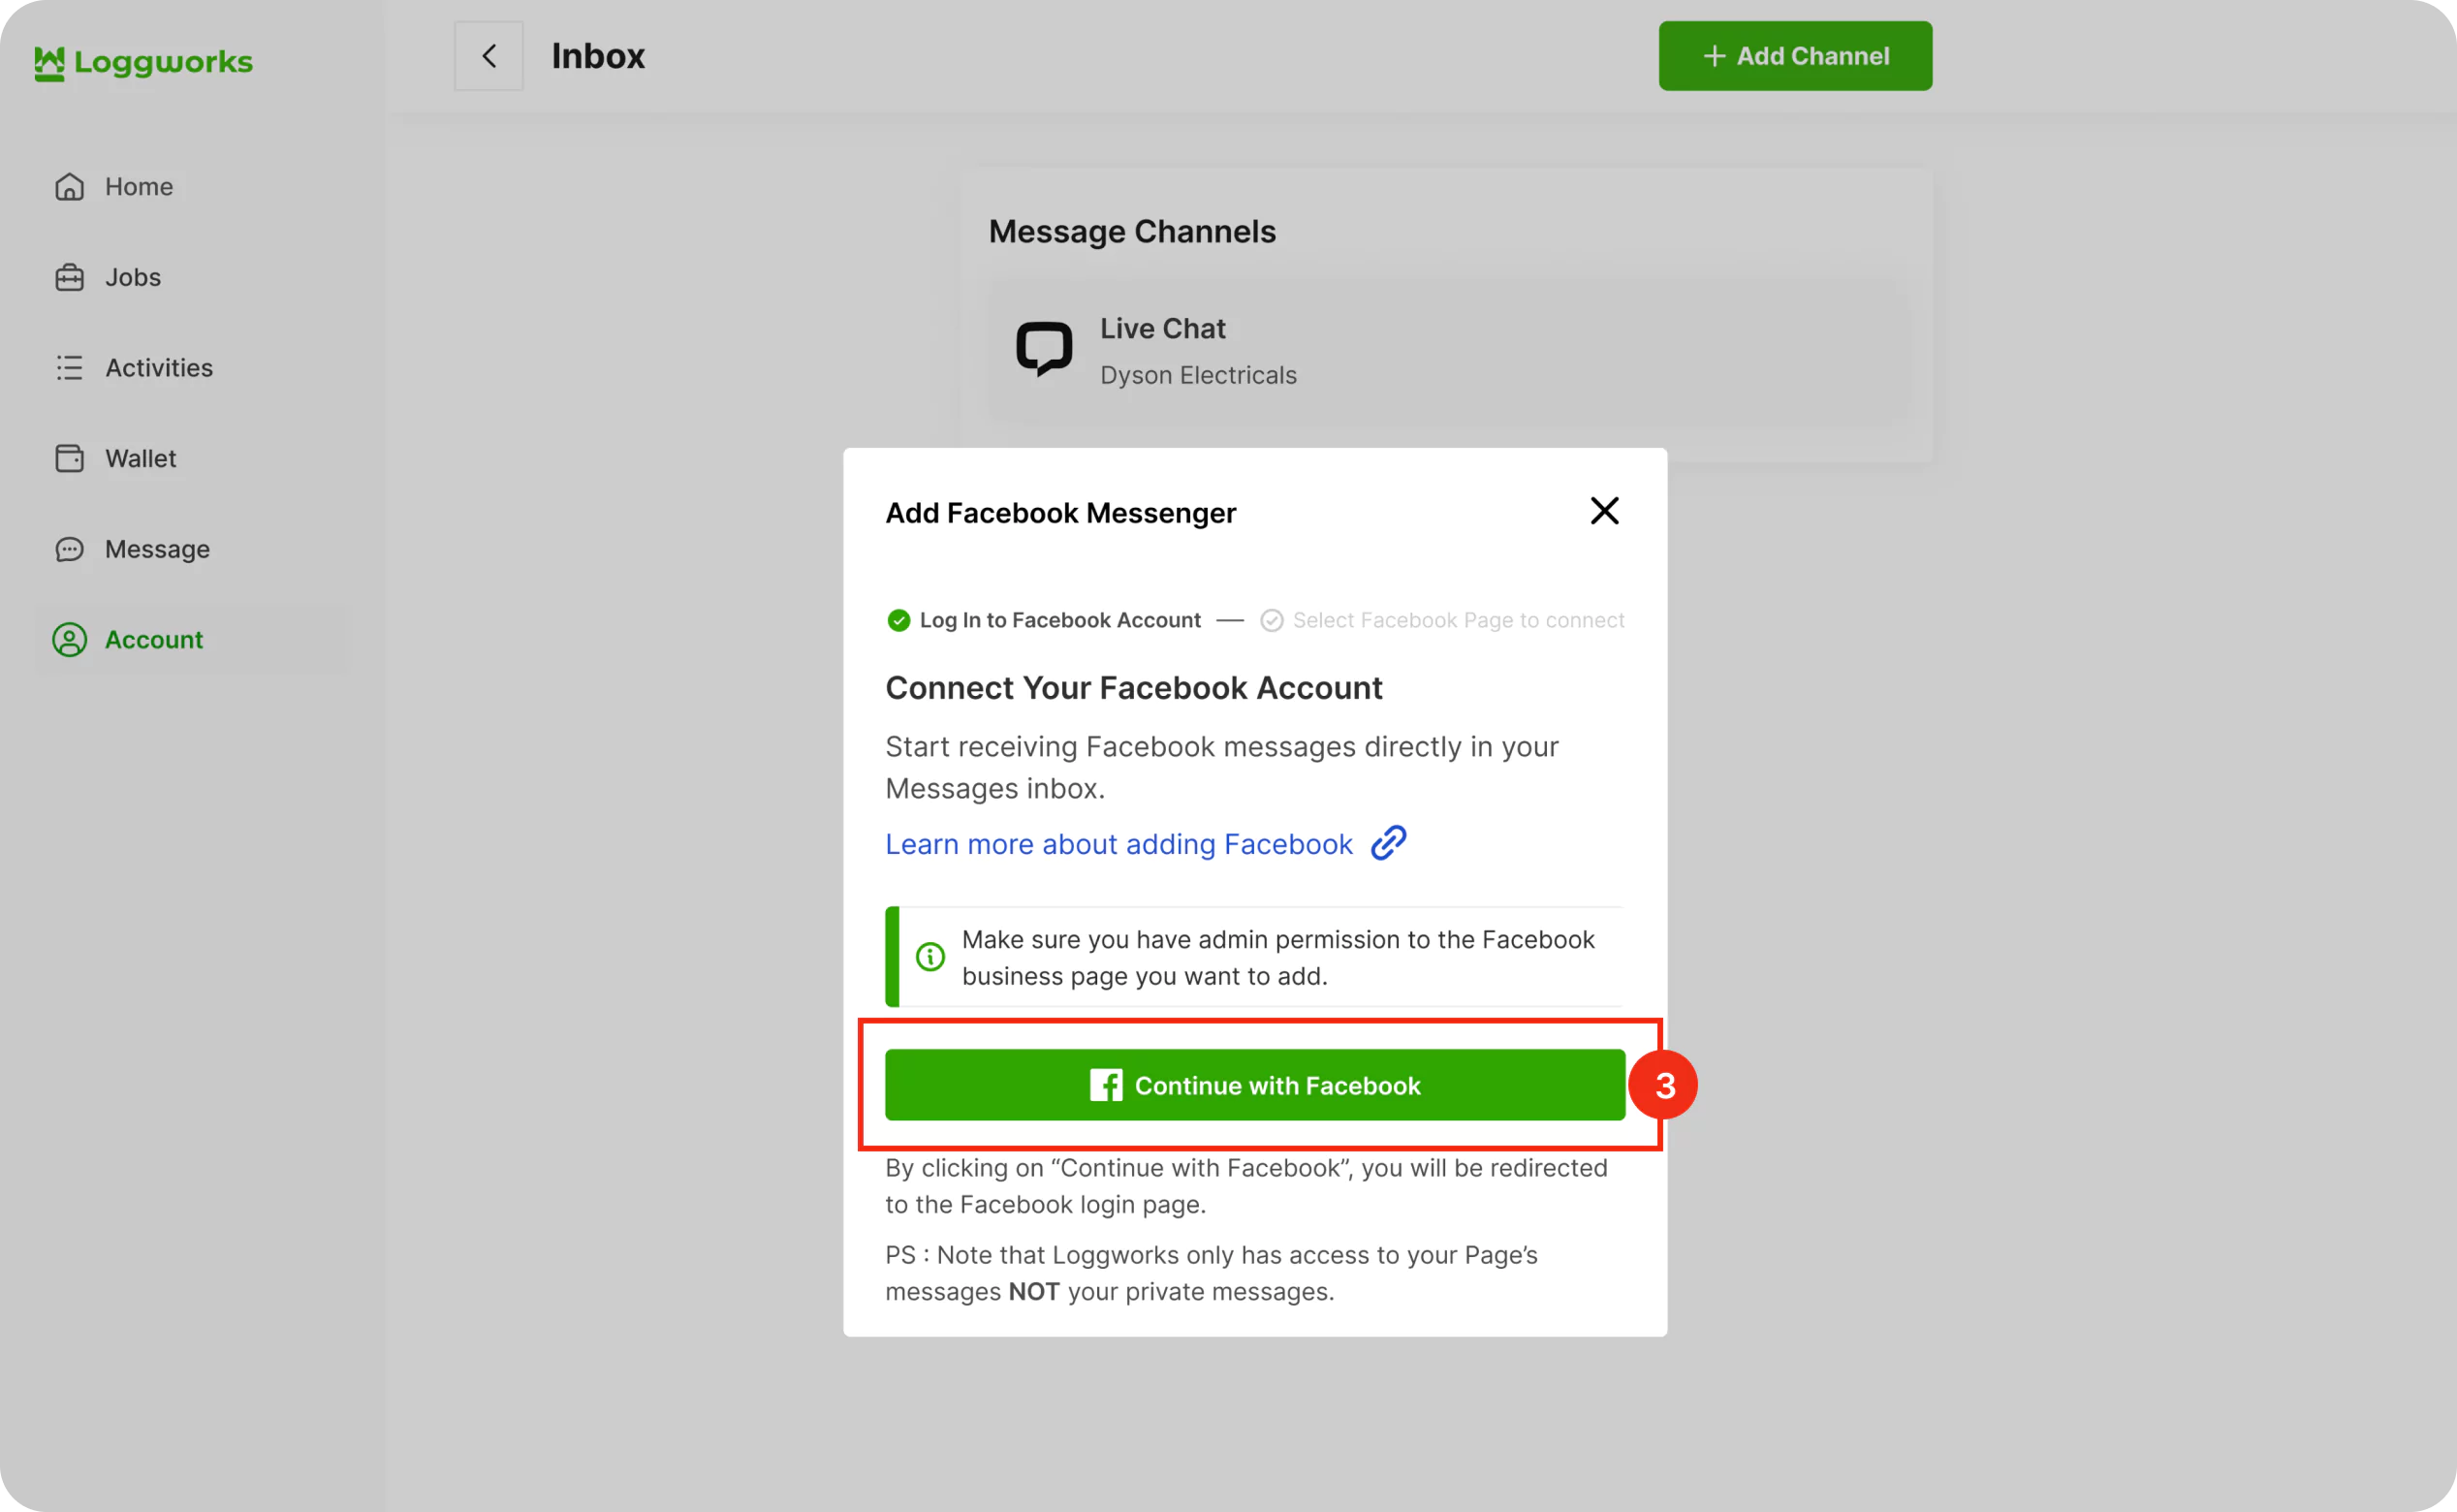
Step 4. Click the “Continue with Facebook” button. It will open a new window for you to login.
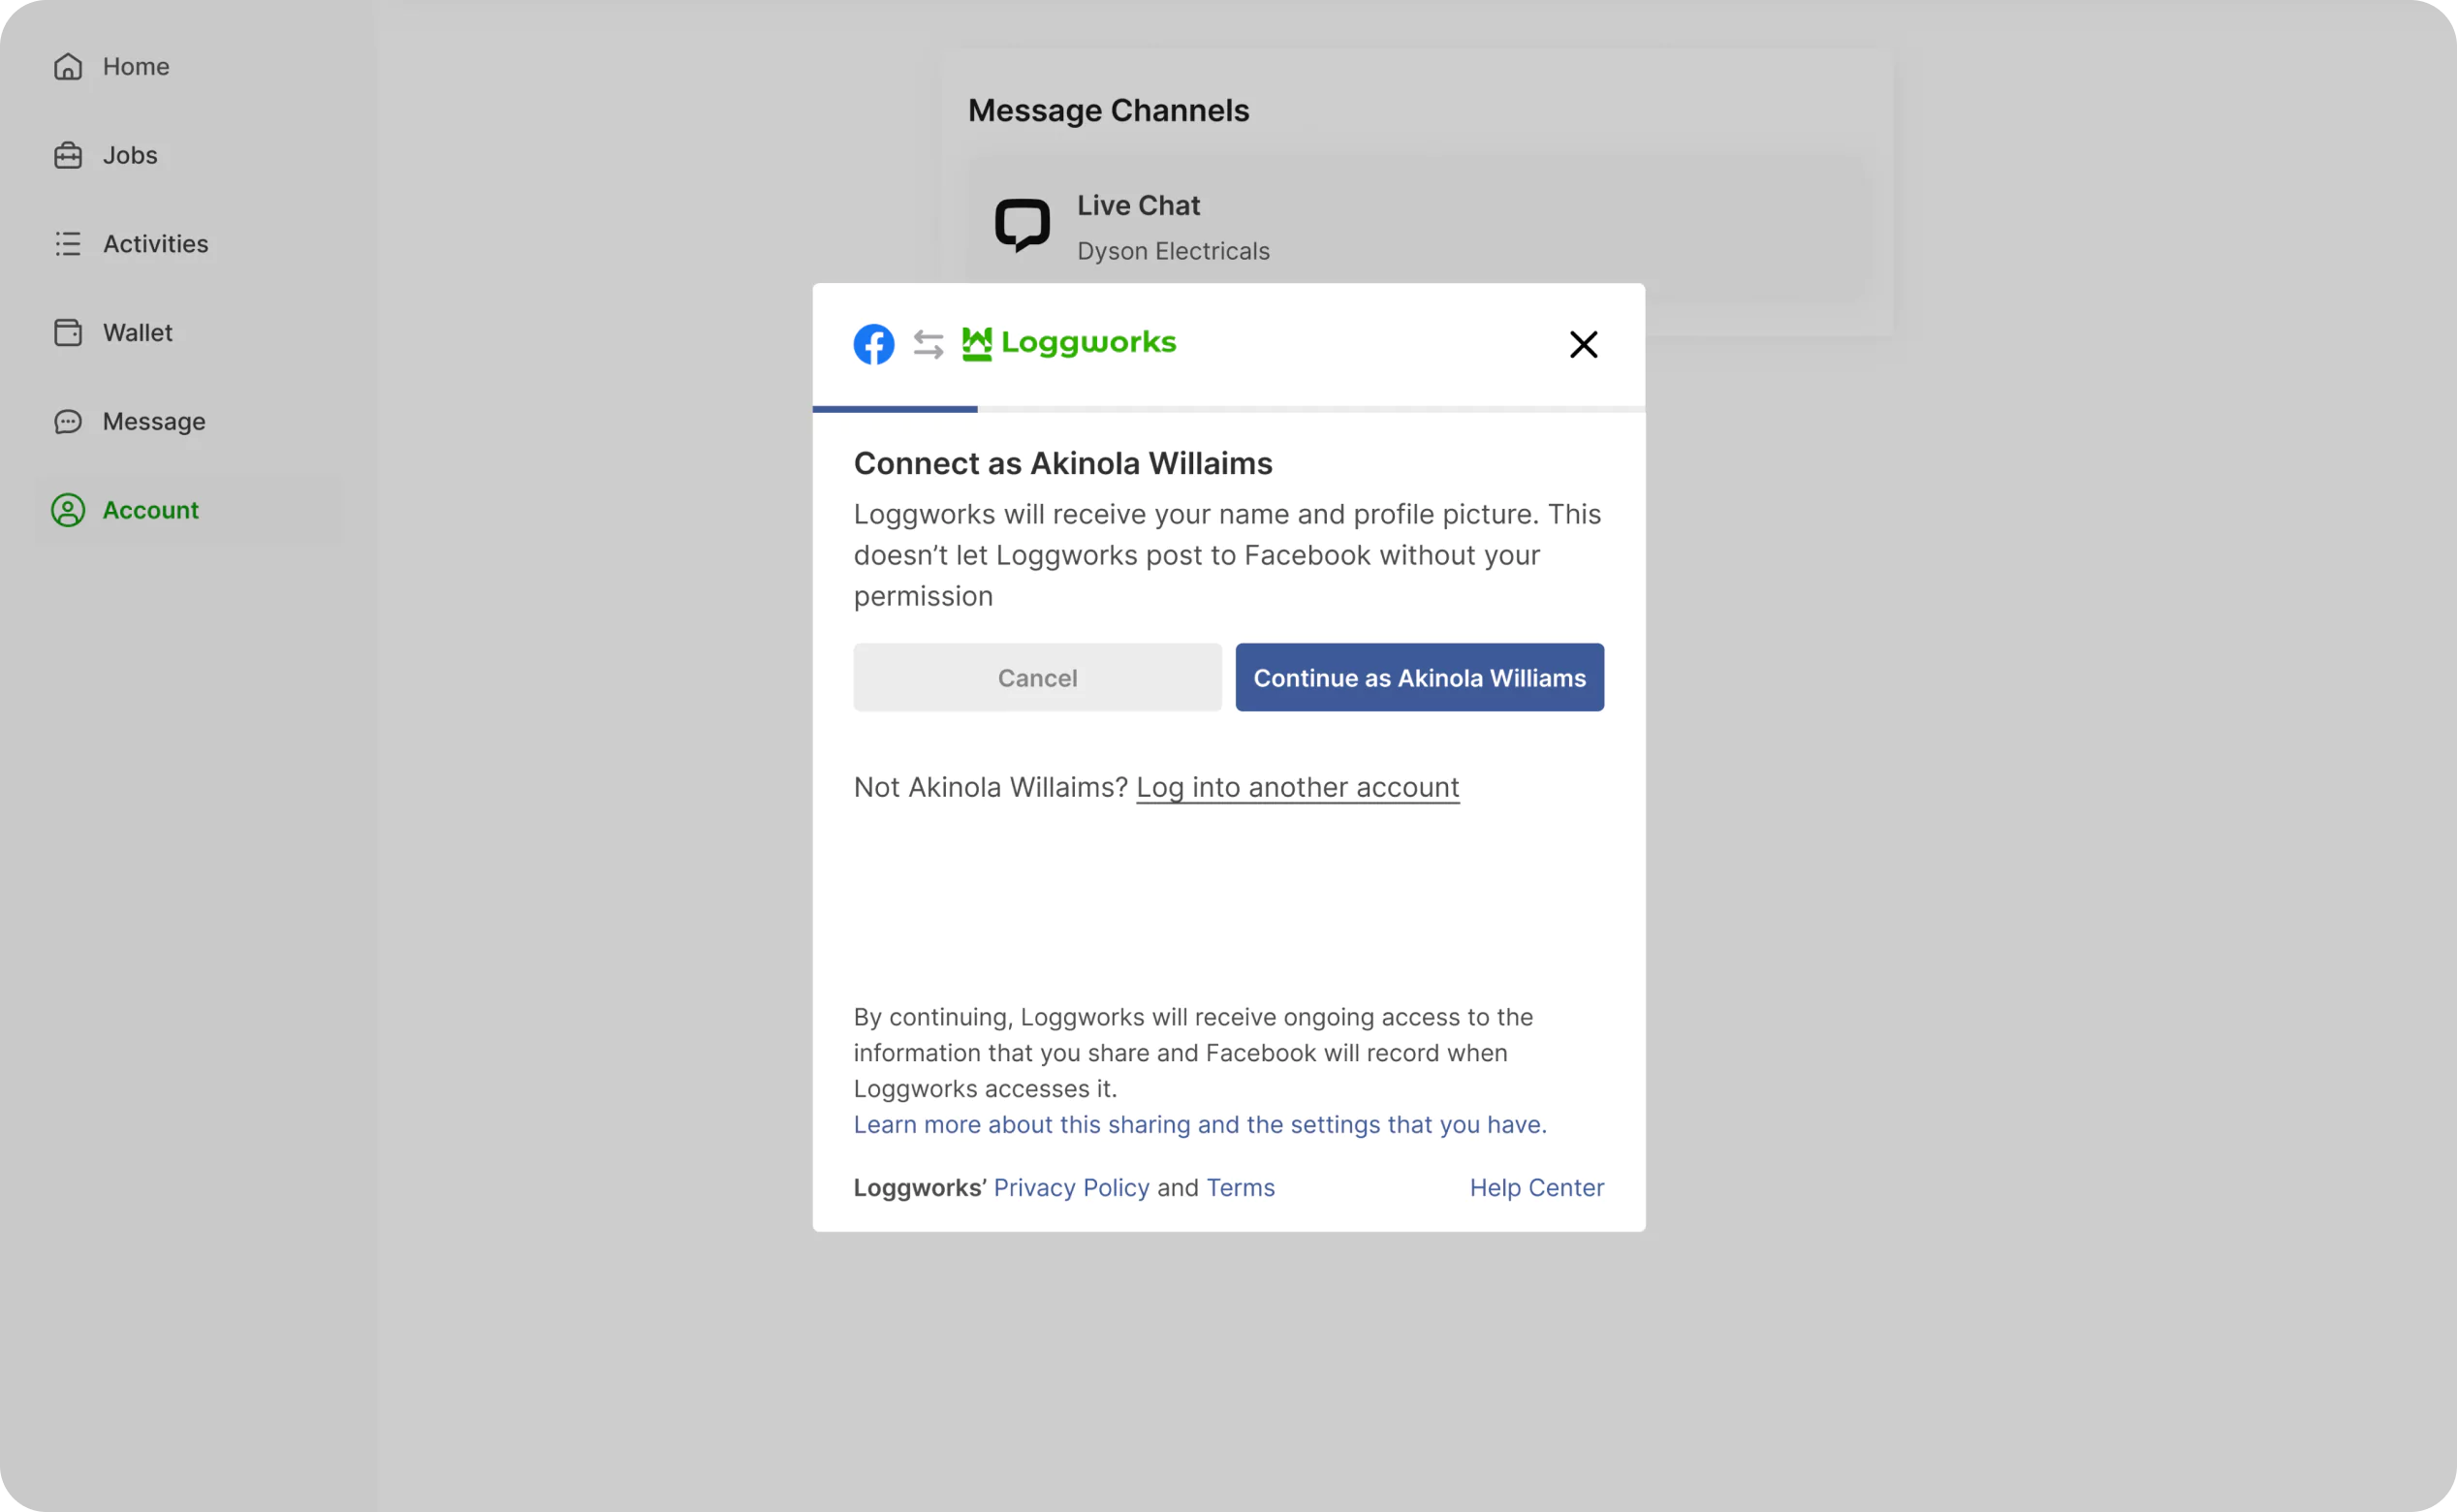

Step 5. You can now select your Facebook page from the dropdown menu that appears on Loggworks.

You have successfully created a Facebook inbox. Whenever a customer sends a message to your Facebook page, you will be able to see and reply to it in Loggworks.
Your freshly configured Facebook inbox should now appear in your list of inboxes. To see this and to make additional settings in your Facebook inbox, go to Settings → Inboxes → click the gear icon on the associated Facebook inbox. You will see the following screen:
Reauthorize.Whenever you need to reconnect and reauthorize your Facebook page, do it from this button.
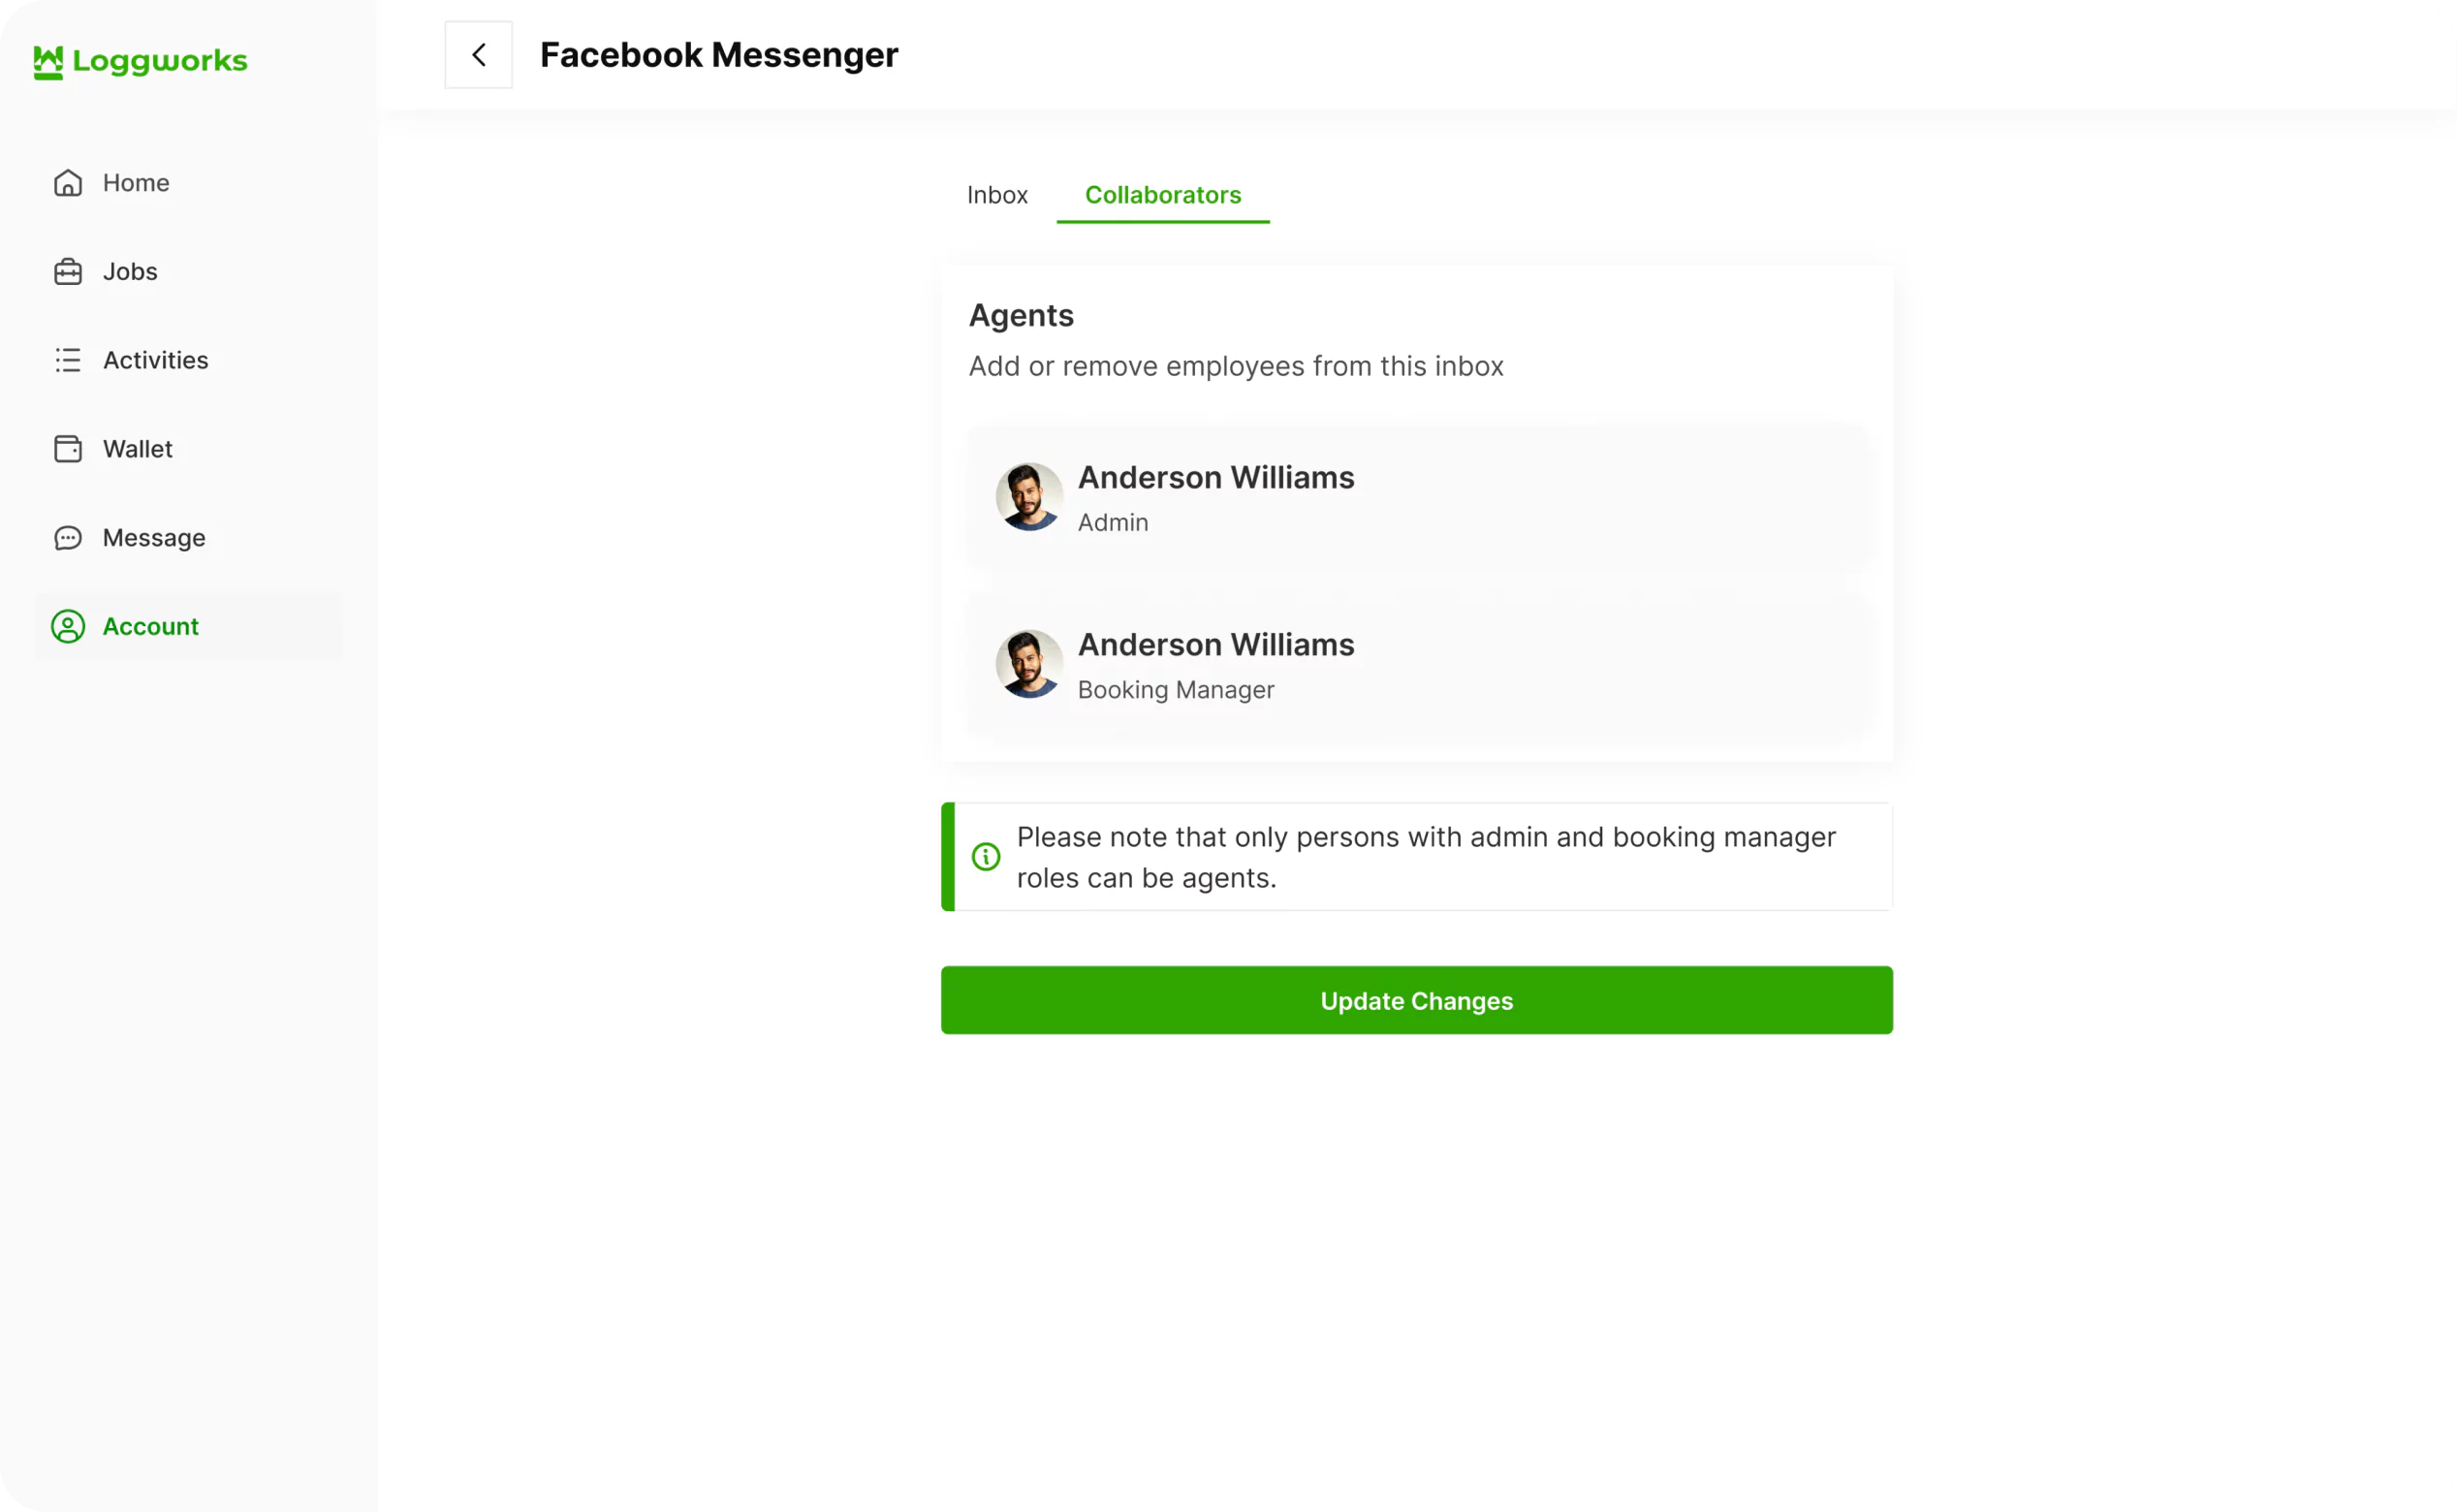
Click on the Collaborators . tab.
Here, you can add Agents to the Inbox or delete Agents who have been already added in the Inbox. Only persons with the admin or booking manager role can be agents.
This guide will take you through how to manage your WhatsApp conversations from Loggworks
Last updated on Feb 29, 2024
©Copyright 2024 loggwork Ltd. All Rights Reserved